Configuring Multiple Applications in a Single Environment (App Tier Routing)
Introduction
Many customers deploy multiple applications in a single environment, which requires OverOps to separate the data for each application. This article explains how to configure the multi-application deployment.
Multiple Application Deployment Configuration
- Provide the OverOps resource with the key (this should begin with an "S" followed by a few numbers).
- Using this key, OverOps enables the “App Tier Routing” feature. Once enabled, this feature will show up under the “Admin View” as below.
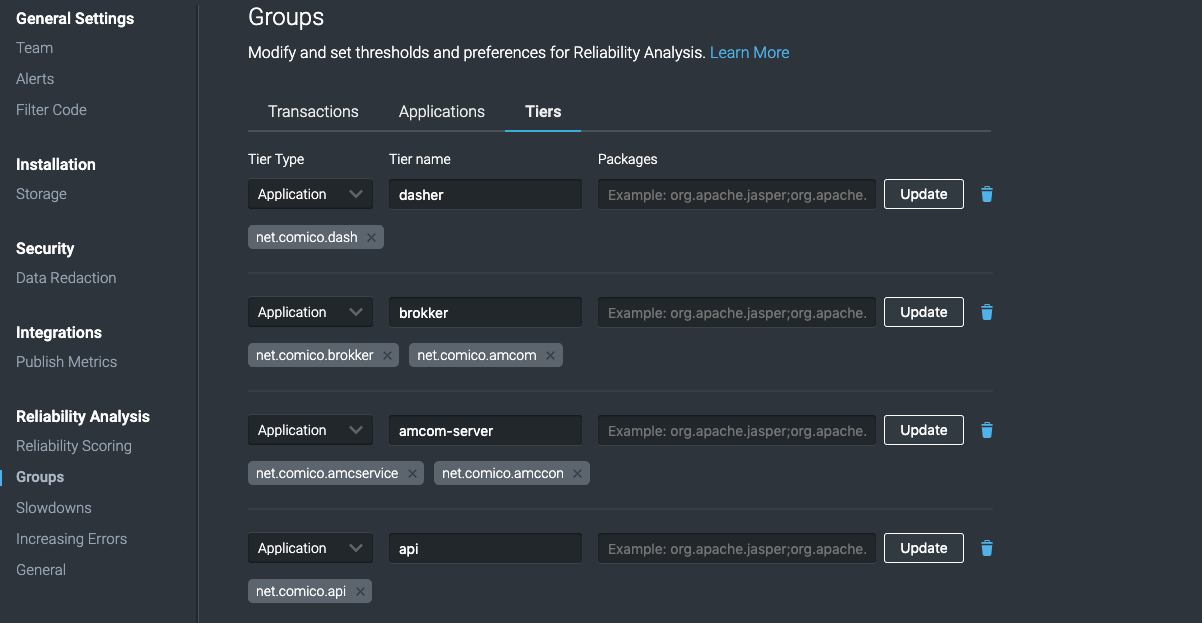
- Click “Settings”, Groups, Tiers, Select “Tier Type” as “Application. Now add your tiers here:
- Below is a sample of the two applications that were added. Once complete, click the Apply button. If you're updating a tier, use the Update button instead.

- The UDF gets applied to all future events. In cases where you'll need to jump-start running the UDF for previous events, there are two options
- Contact your OverOps resource with the Service Key: They can refresh the UDF to take up all events.
- Manually refresh the UDF as follows:
a. Open the App Tier Routing UDF
b. Change the "text" in the comment section, and verify that you get the "Parameters successfully validated" message.
c. Click Save & Finish.
- If there are a large number of “events”, please wait for a few minutes for the UDF to kick in.
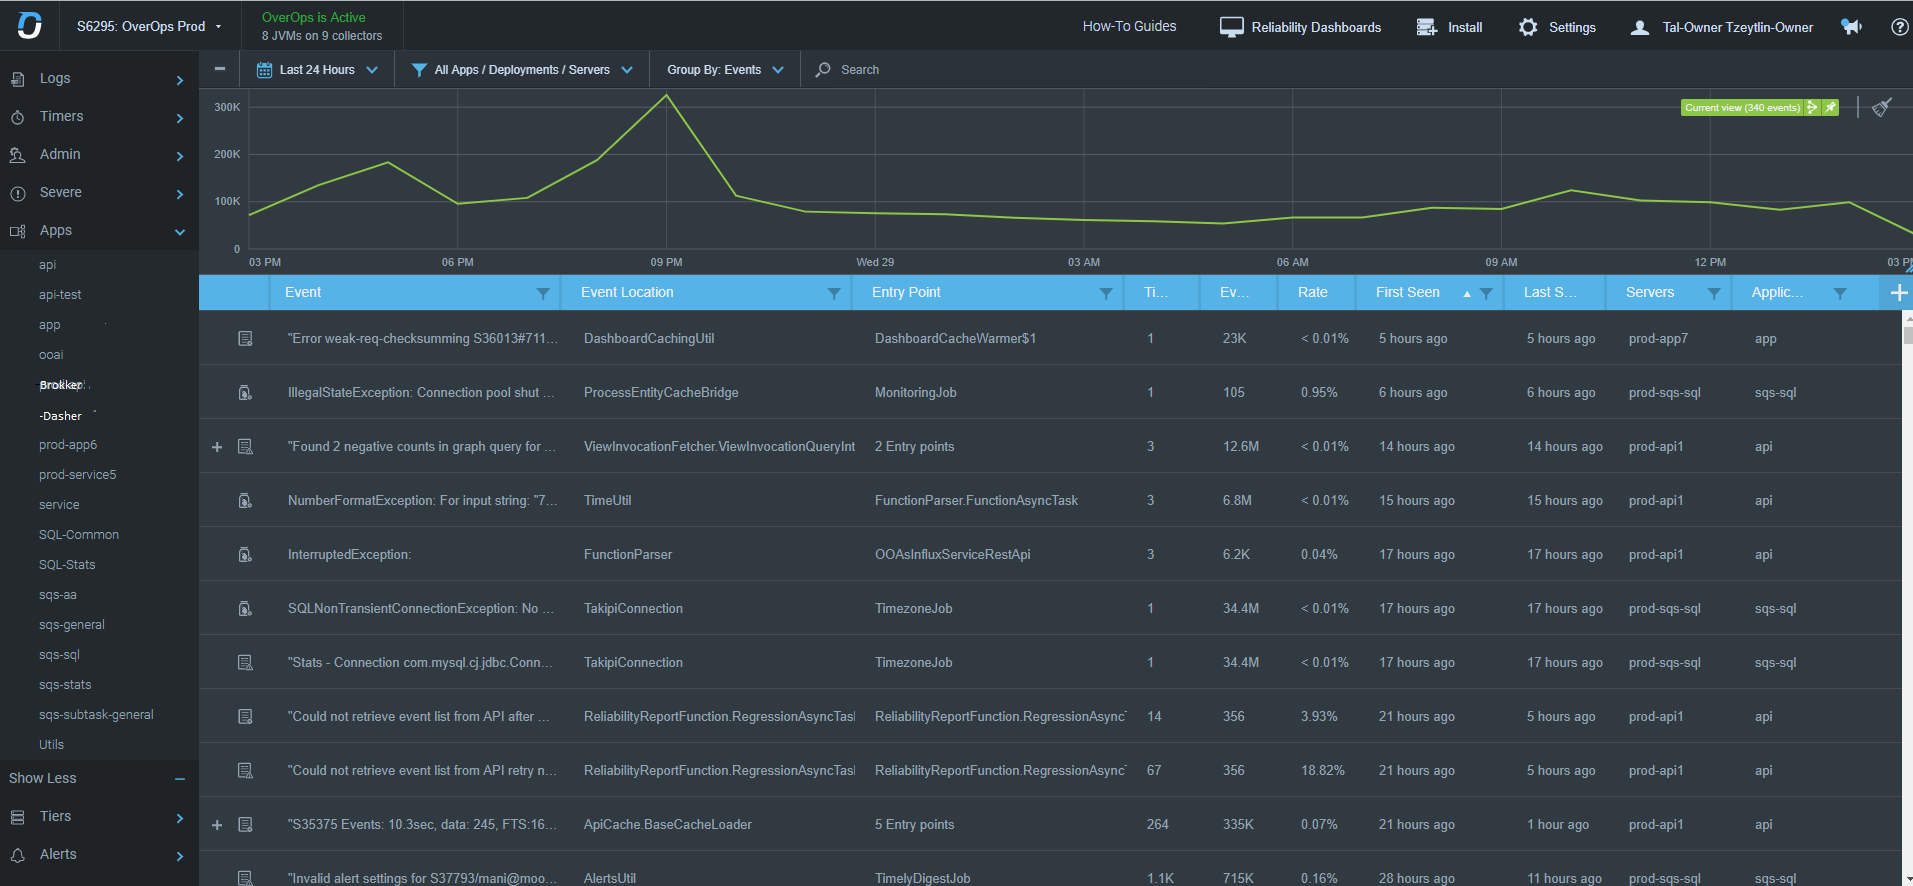
When complete, you should see the “Applications” under the “Apps” view on the left.

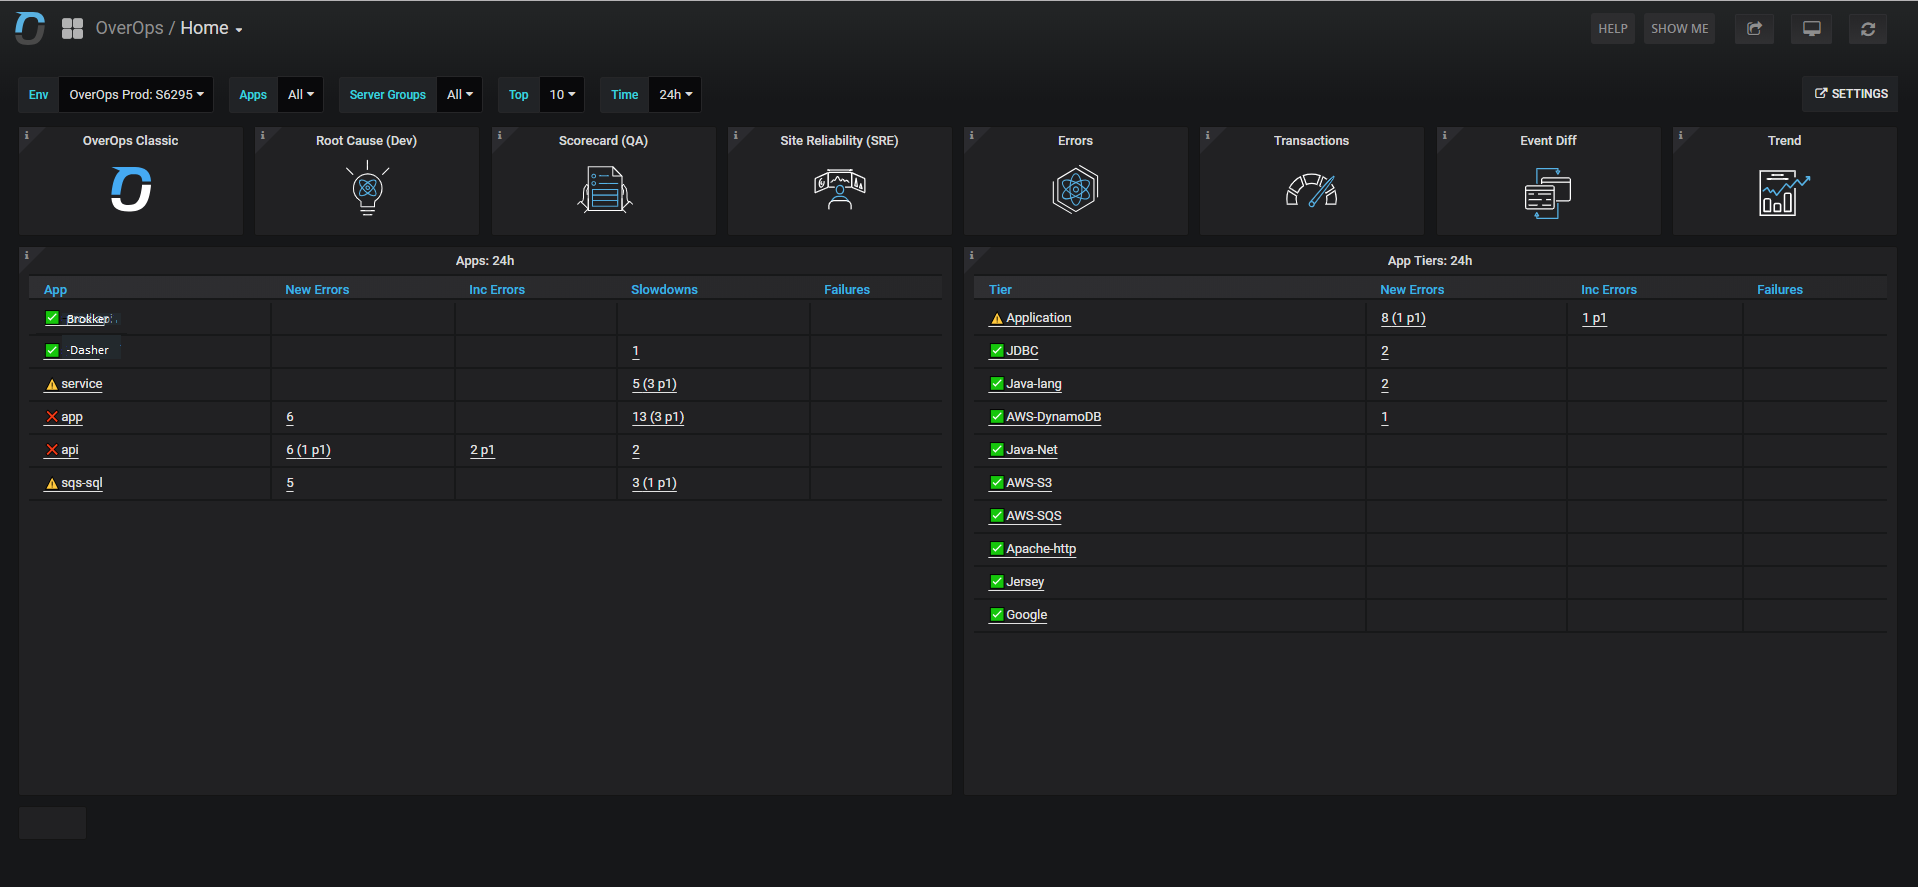
Dashboards should also reflect the newly created Applications with the “-” extension e.g. -Brokker, -Dasher

Using the Multiple Application Files in One Environment Functionality
Naming Conventions
- OverOps Application Name: APPID
- Examples: App12345
- OverOps Deployment Name: A comma-separated ApplicationName:Version that’s deployed in the Web Application Resource (WAR)
- Example: Brokker:
{GitBuild}.{dateTime},Dasher:{GitBuild}.{dateTime}
- Example: Brokker:
Functionality
- OverOps provides a User Defined Function (UDF) that splits the events across ApplicationNames. The UDF works as described below.
- Changes to the OverOps Event Explorer and Reliability dashboards: This feature does not affect the OverOps Event Explorer and Reliability dashboards from a users perspective expect that the dashboards now display ApplicationSpecificValues.
UDF Splits out Code at the Stack Trace
Application Name:
- The code needs to be split at the stack trace to separate events by Application; the existing App Routing UDF has been enhanced to split out these events.
- The UDF will need the Application name & package - this will be done through the UDF Settings Console (that will be built in the future).
- Sample Namespace mapping: net.comico.brokker=Brokker, com.comico.brokker=Brokker
Visualizing the Data
Data is visualized through both the OverOps Event Explorer dashboard and the Grafana Reliability dashboards.
OverOps Event Explorer
- Labels are used to identify the application. For example: Brokker.app
- The Application Name will show as -D provided at command line. For example: APPID1234
- The deployment will show as the Deployment Name that was provided. For example: Brokker:
{GitBuild}.{dateTime},Dasher:{GitBuild}.{dateTime}for all events. - The application views will be built automatically and will show up as the actual Application Name. For example: Brokker.
Reliability Dashboards
- Applications will show up as normal in all dropdowns and widgets, For example:
APPID1234
Brokker
Dasher - Deployments will show the full deployment name and will be broken by customizable setting (break comma-separated list of deployment names). For example:
Brokker:{GitBuild}.{dateTime}
Dasher:{GitBuild}.{dateTime}
Brokker:{GitBuild}.{dateTime},<app name>:{GitBuild}.{dateTime}
Updated 9 months ago
