Automate CI/CD Quality Gates
Introduction
Many of our customers already use OverOps as part of their Continuous Integration/Continuous Delivery (CI/CD) pipeline. By checking with OverOps for new errors after building and testing, quality and reliability engineers can gain insights into any new errors that have been introduced by the build and determine whether the build should be promoted or not.
When setting up your OverOps to be a part of your CI/CD pipeline you'll need to understand the different pieces that need to be in place. As outlined in the diagram below, you'll need a CI/CD environment (Jenkins, Bamboo, etc) with the OverOps Micro-Agent as well as the OverOps Collector. If you're deploying an On-Premises solution you'll also need the OverOps Continuous Reliability (CR) Server, and if you're deploying an On-Premises Data solution, you'll need the Variable Store. To learn more about deployment options and components, refer to the article Deployment Options .

The CI/CD environment executes the pipelines with an attached Micro-Agent. The attached Micro-Agent will monitor pipelines and communicate any findings with the Collector. The Collector will then communicate the Micro-Agent finds with the CR Server. The CR Server will then be able to generate the Quality Reports needed to be displayed in the CI/CD environment.
Set up the CI/CD Quality Gates
- Verify that you have an OverOps SaaS or On-Premises environment set up.
- Next, verify that you have a Java Micro-Agent installed on your CI/CD environment. For more information on installing the Micro Agent see Install a Java Micro-Agent.
- Now that the Micro-Agent is installed, you'll need to attach it to your application. This can be done a number of ways depending on your preference, such as using Maven or Gradle. If you prefer to attach the Micro-agent using another method, choose from one of the options listed in Attach the Java Micro-Agent.
- Finally the OverOps plugin will need to be installed for the given CI/CD environment that's being used. Below are a list of available CI/CD Environments and links to their various setup instructions.
- Jenkins CI / CD Integration https://github.com/jenkinsci/overops-query-plugin
- TeamCity CI / CD Integration https://github.com/takipi/teamcity-overops-plugin
- Concourse CI / CD Integration https://github.com/takipi/concourse-overops-plugin
Automating the CI/CD Quality Gates Process for Jenkins
A Jenkins Plugin is available to generate a Quality Report and prevent promotion of a build based on the status of configurable quality gates. As outlined above, the Micro-Agent will need to be attached during the test phase of your CI pipeline to collect the data used to generate the Quality Report. In this section, we will setup a Jenkins Job to build a Java application using Maven OverOps attached at the test phase and generate a Quality Report.
Prerequisites
Before we begin, make sure your Collector is up and running and has successfully connected to the OverOps CR Server. Make a note of your Environment ID (e.g. S12345), your Collector's hostname and port, the CR Server's API URL (https://api.overops.com for SaaS), and your API Token. You'll also need to have admin access to your Jenkins server.
Install the App
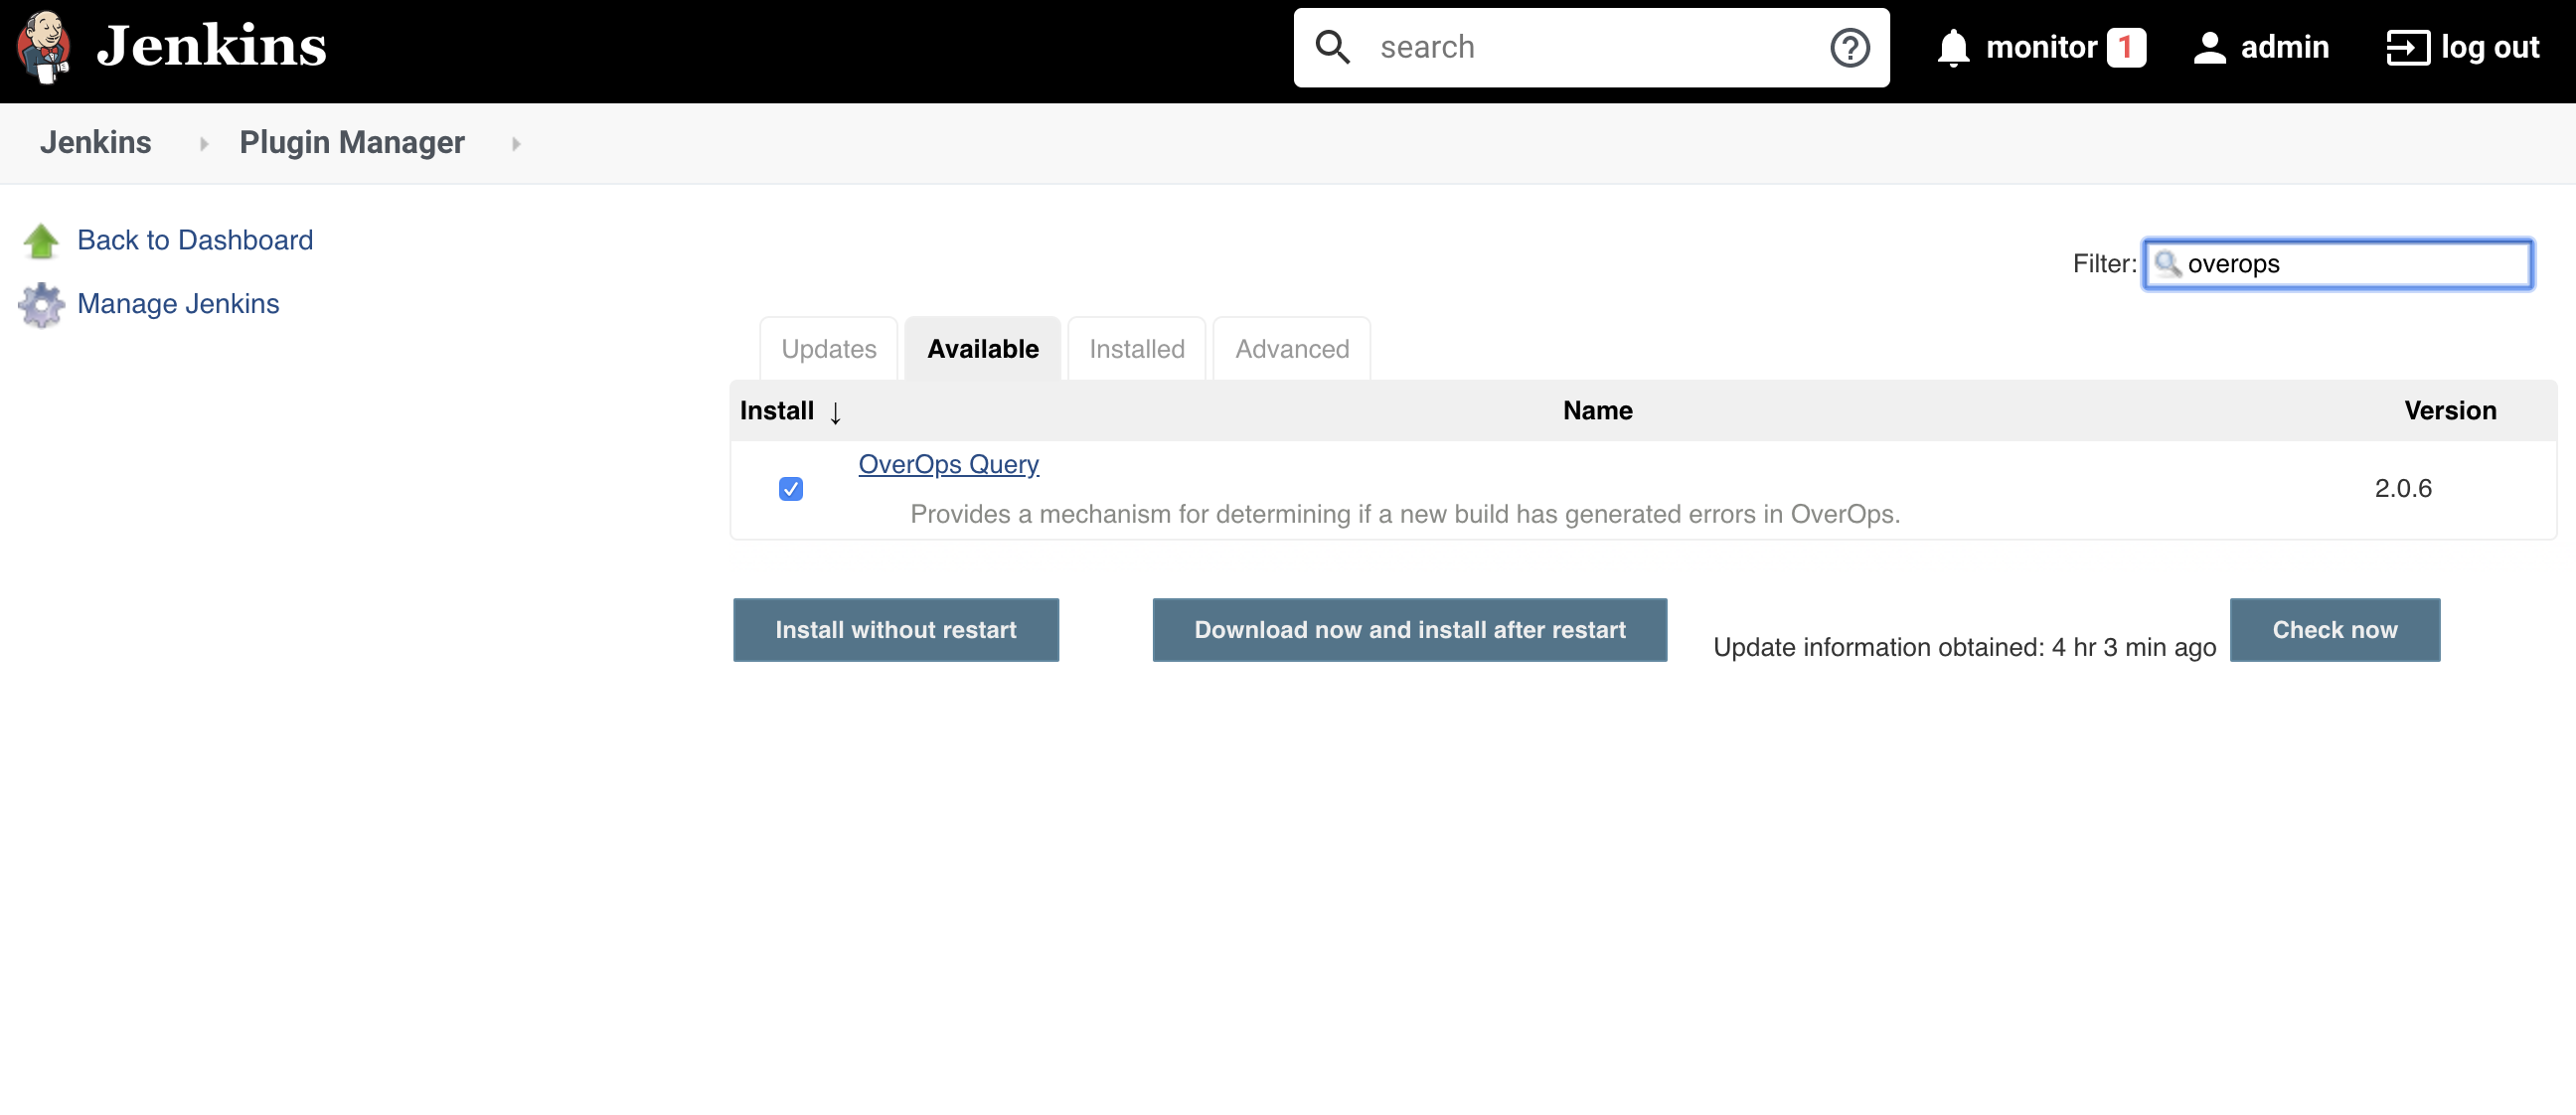
In Jenkins, navigate to Manage Jenkins → Manage Plugins. Click Available and filter on OverOps. Go ahead and install the OverOps Query Plugin once you find it.
Configure the App
After installing the app, go back to the Jenkins homepage and navigate to Manage Jenkins → System Configuration. Scroll down to the OverOps Quality Report section. Enter the API URL for your CR Server, along with your API Token and Environment ID. Click Test Connection to verify a successful connection, then click Save to save these settings.

Configure the Pipeline/Job
In this example, we'll check out code from GitHub and use Maven to run tests. Go ahead and create a Jenkins Job with your preferred name if you don't have one already.
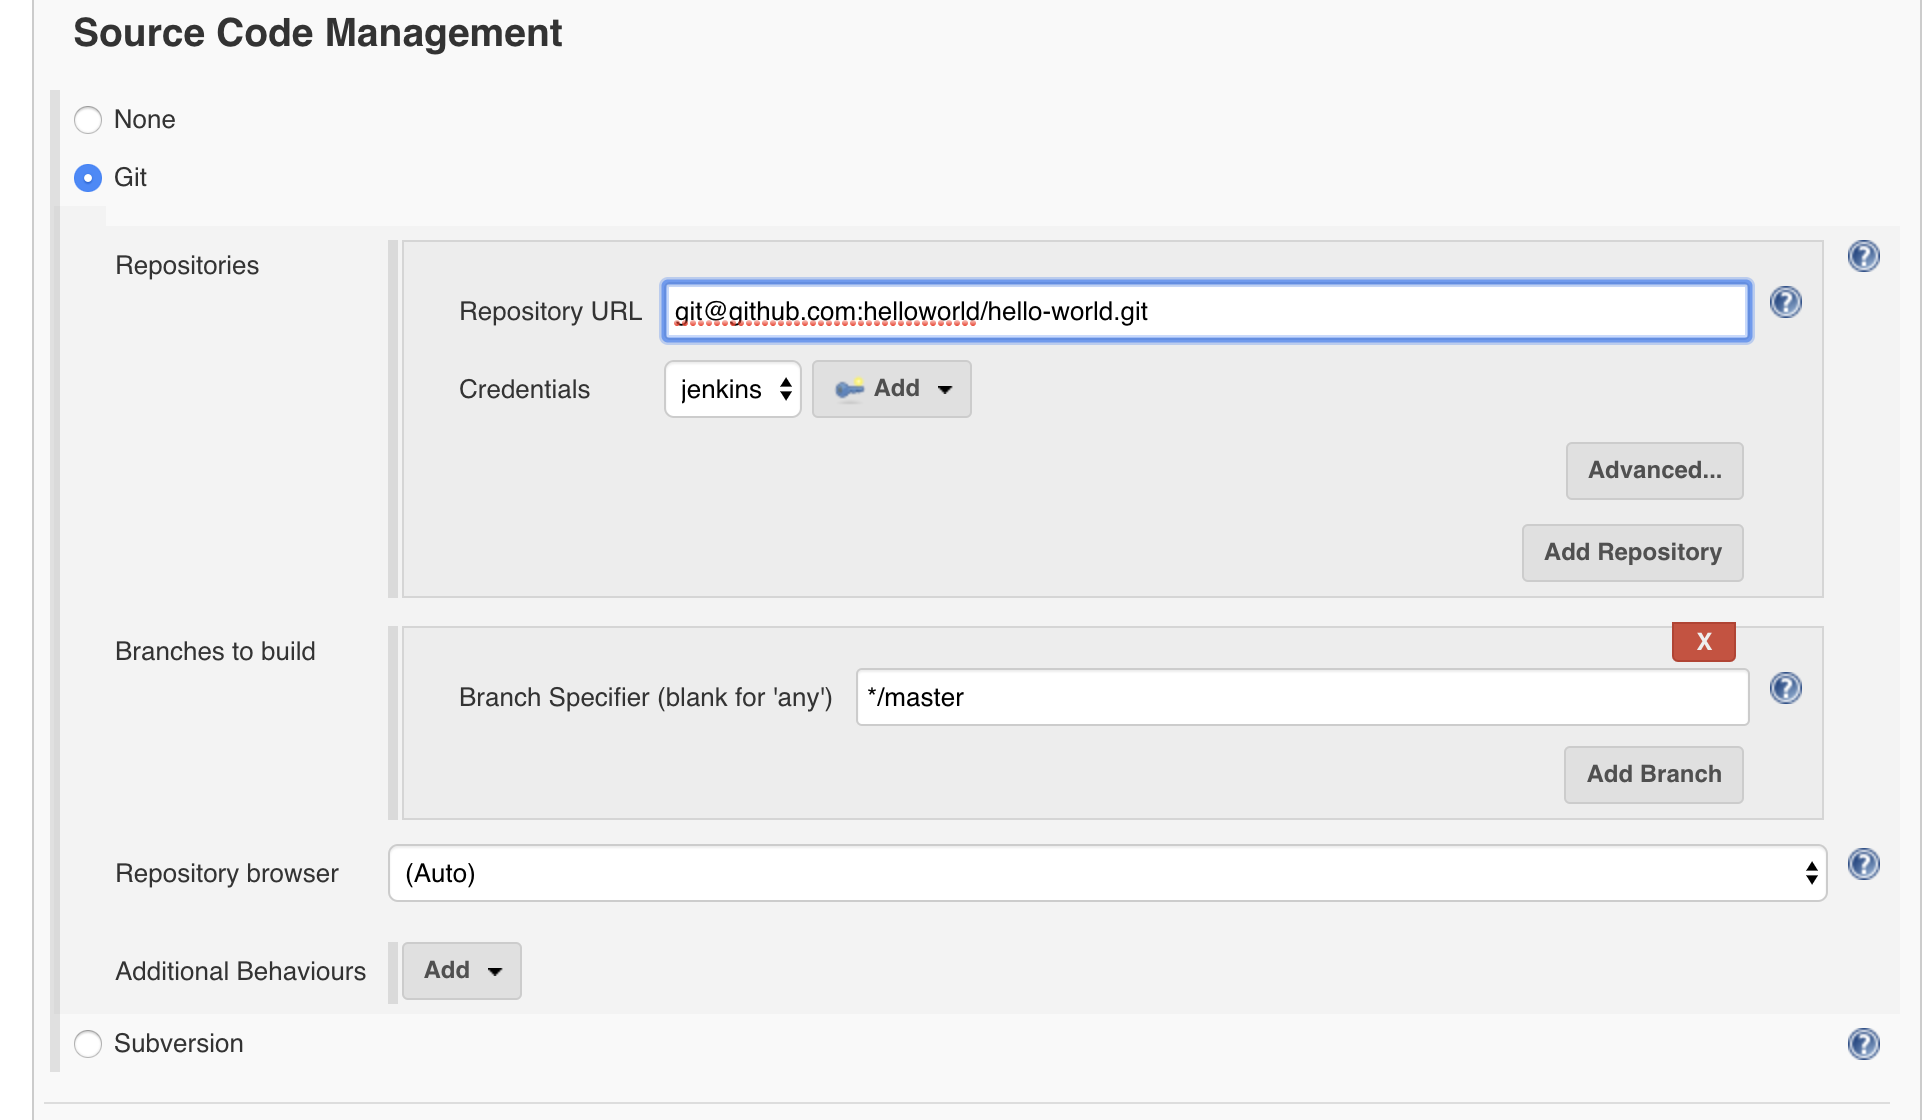
In the Source Code Management section go ahead and add your GitHub repository.
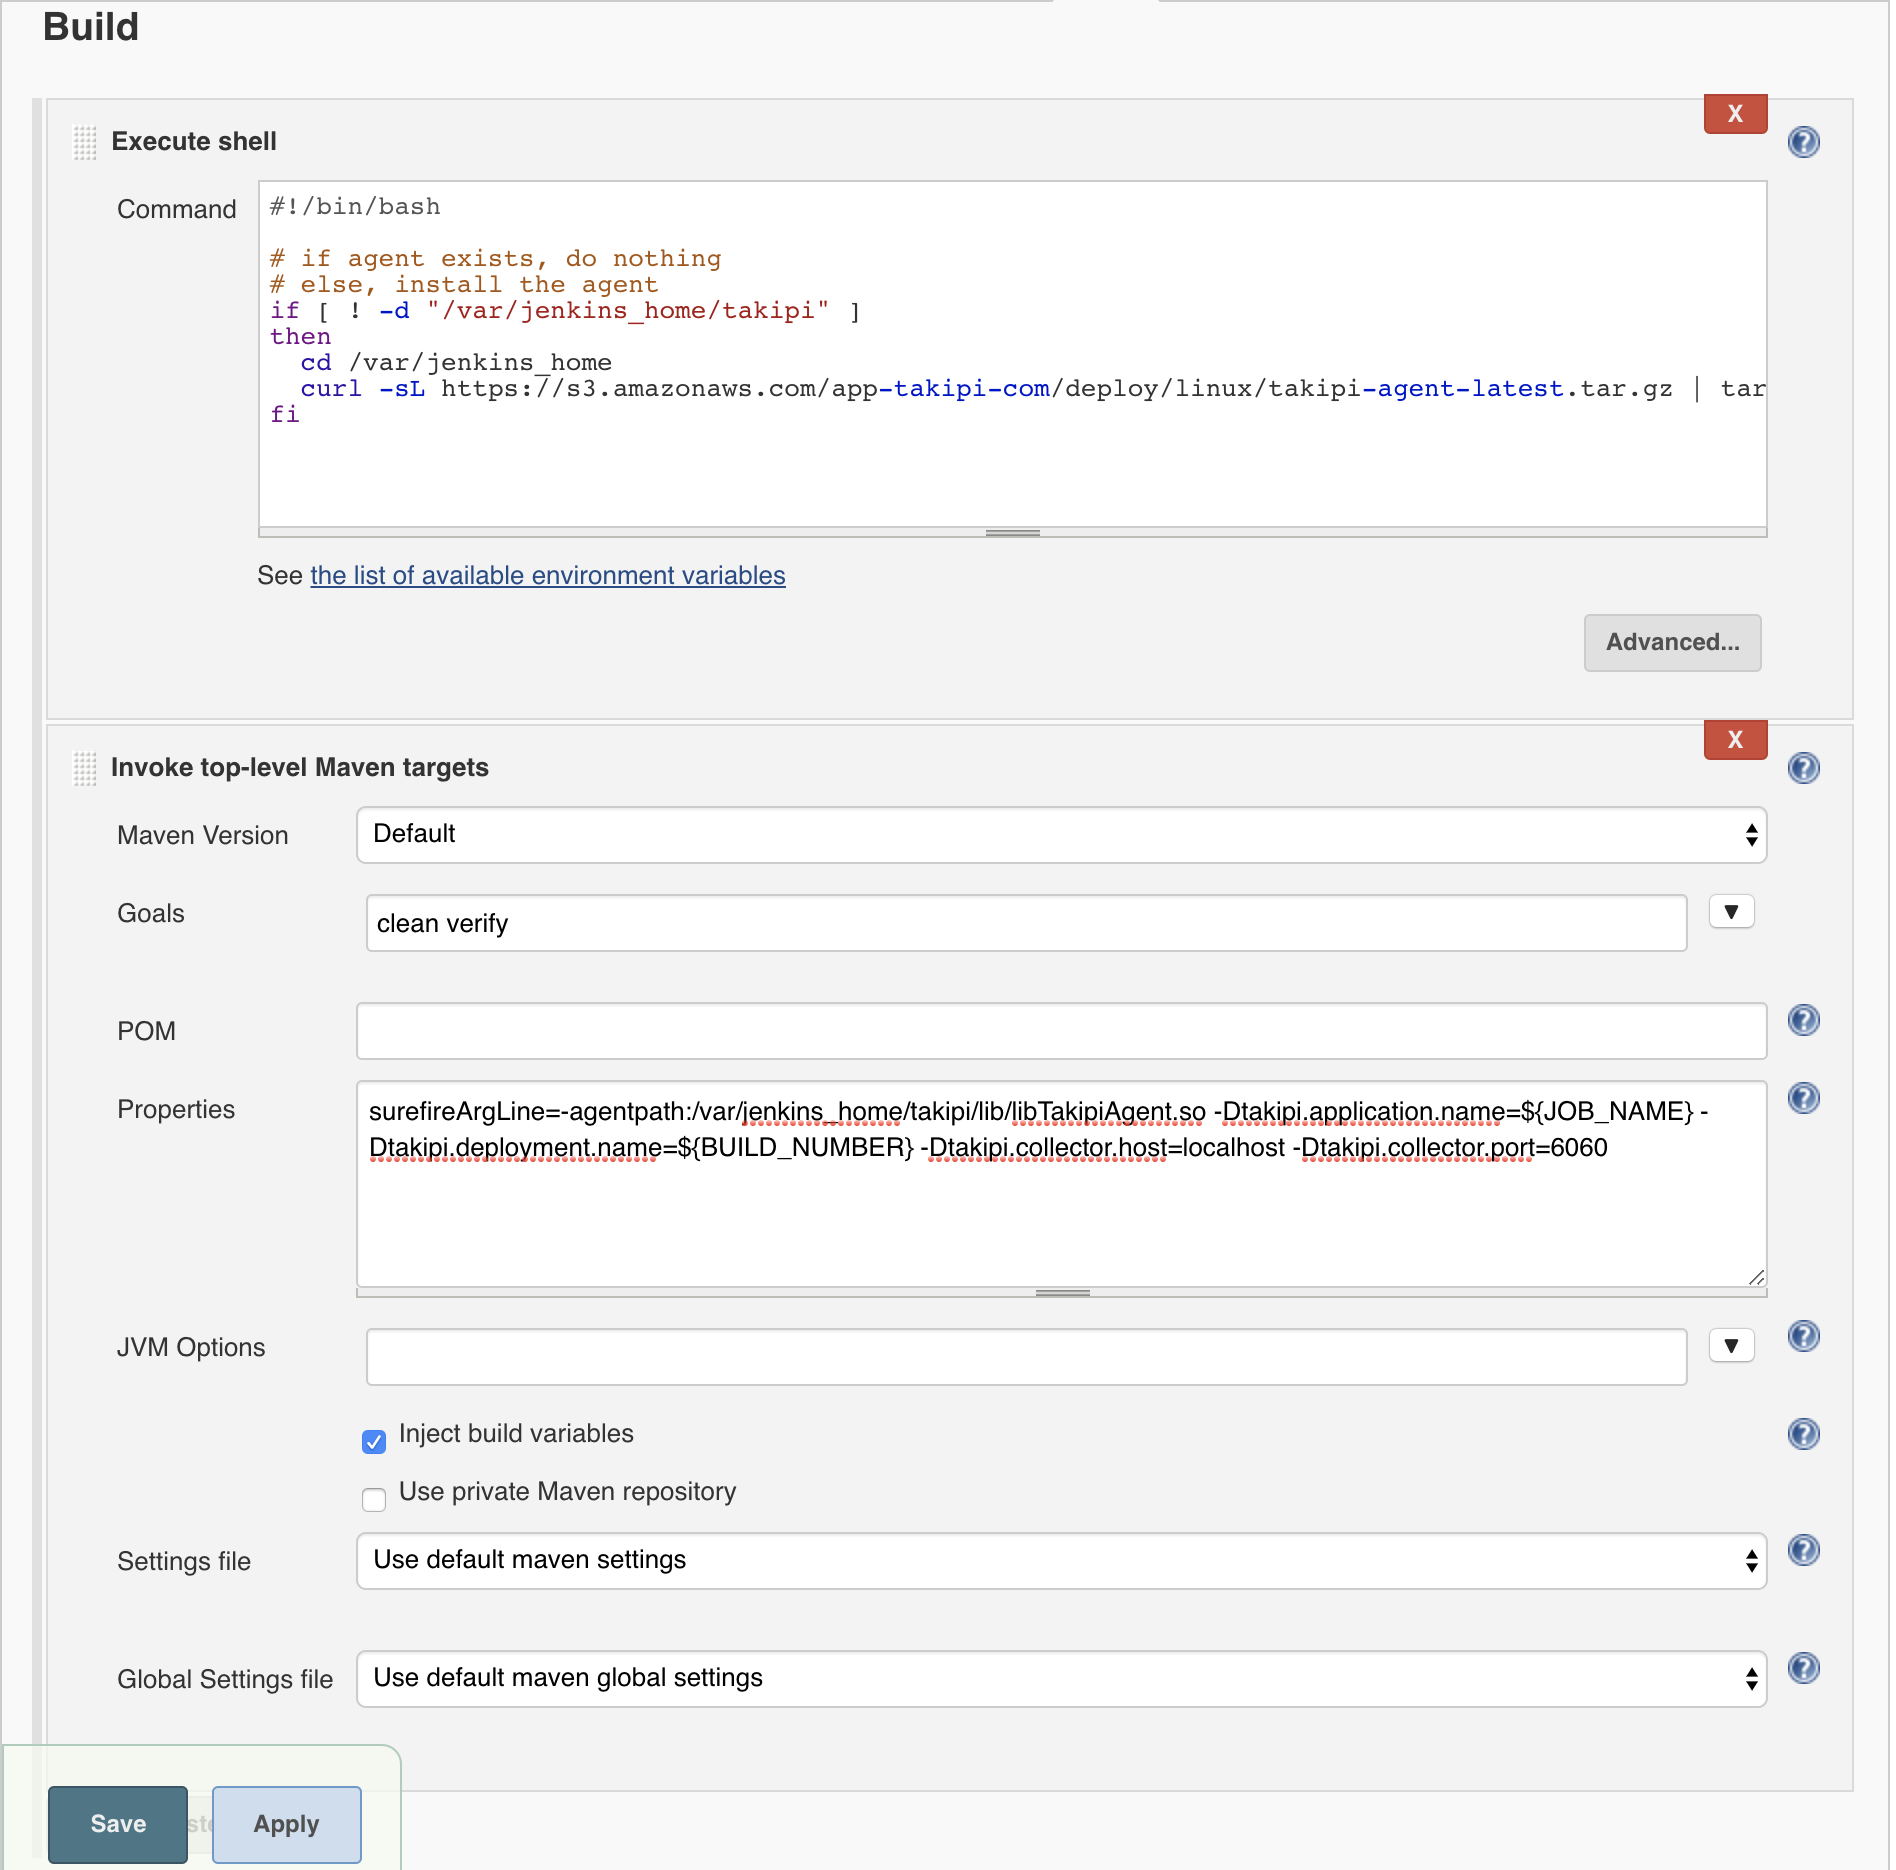
Next scroll down to the Build section and add a Execute shell step with the following script. This script will install the agent on your Jenkins server if it doesn't already exist.
#!/bin/bash

# if agent exists, do nothing
# else, install the agent
if [ ! -d "/var/jenkins_home/takipi" ]
then
  cd /var/jenkins_home
  curl -sL https://s3.amazonaws.com/app-takipi-com/deploy/linux/takipi-agent-latest.tar.gz | tar -xvzf -
fi
Next add a Maven step with the goals clean verify. Click on advanced and add this line to the Properties section. This will create a property that will be used in your pom.xml to attached the agent to the test phase.
surefireArgLine=-agentpath:/var/jenkins_home/takipi/lib/libTakipiAgent.so -Dtakipi.application.name=${JOB_NAME} -Dtakipi.deployment.name=${BUILD_NUMBER} -Dtakipi.collector.host=localhost -Dtakipi.collector.port=6060Here is what the Build section should now look like.
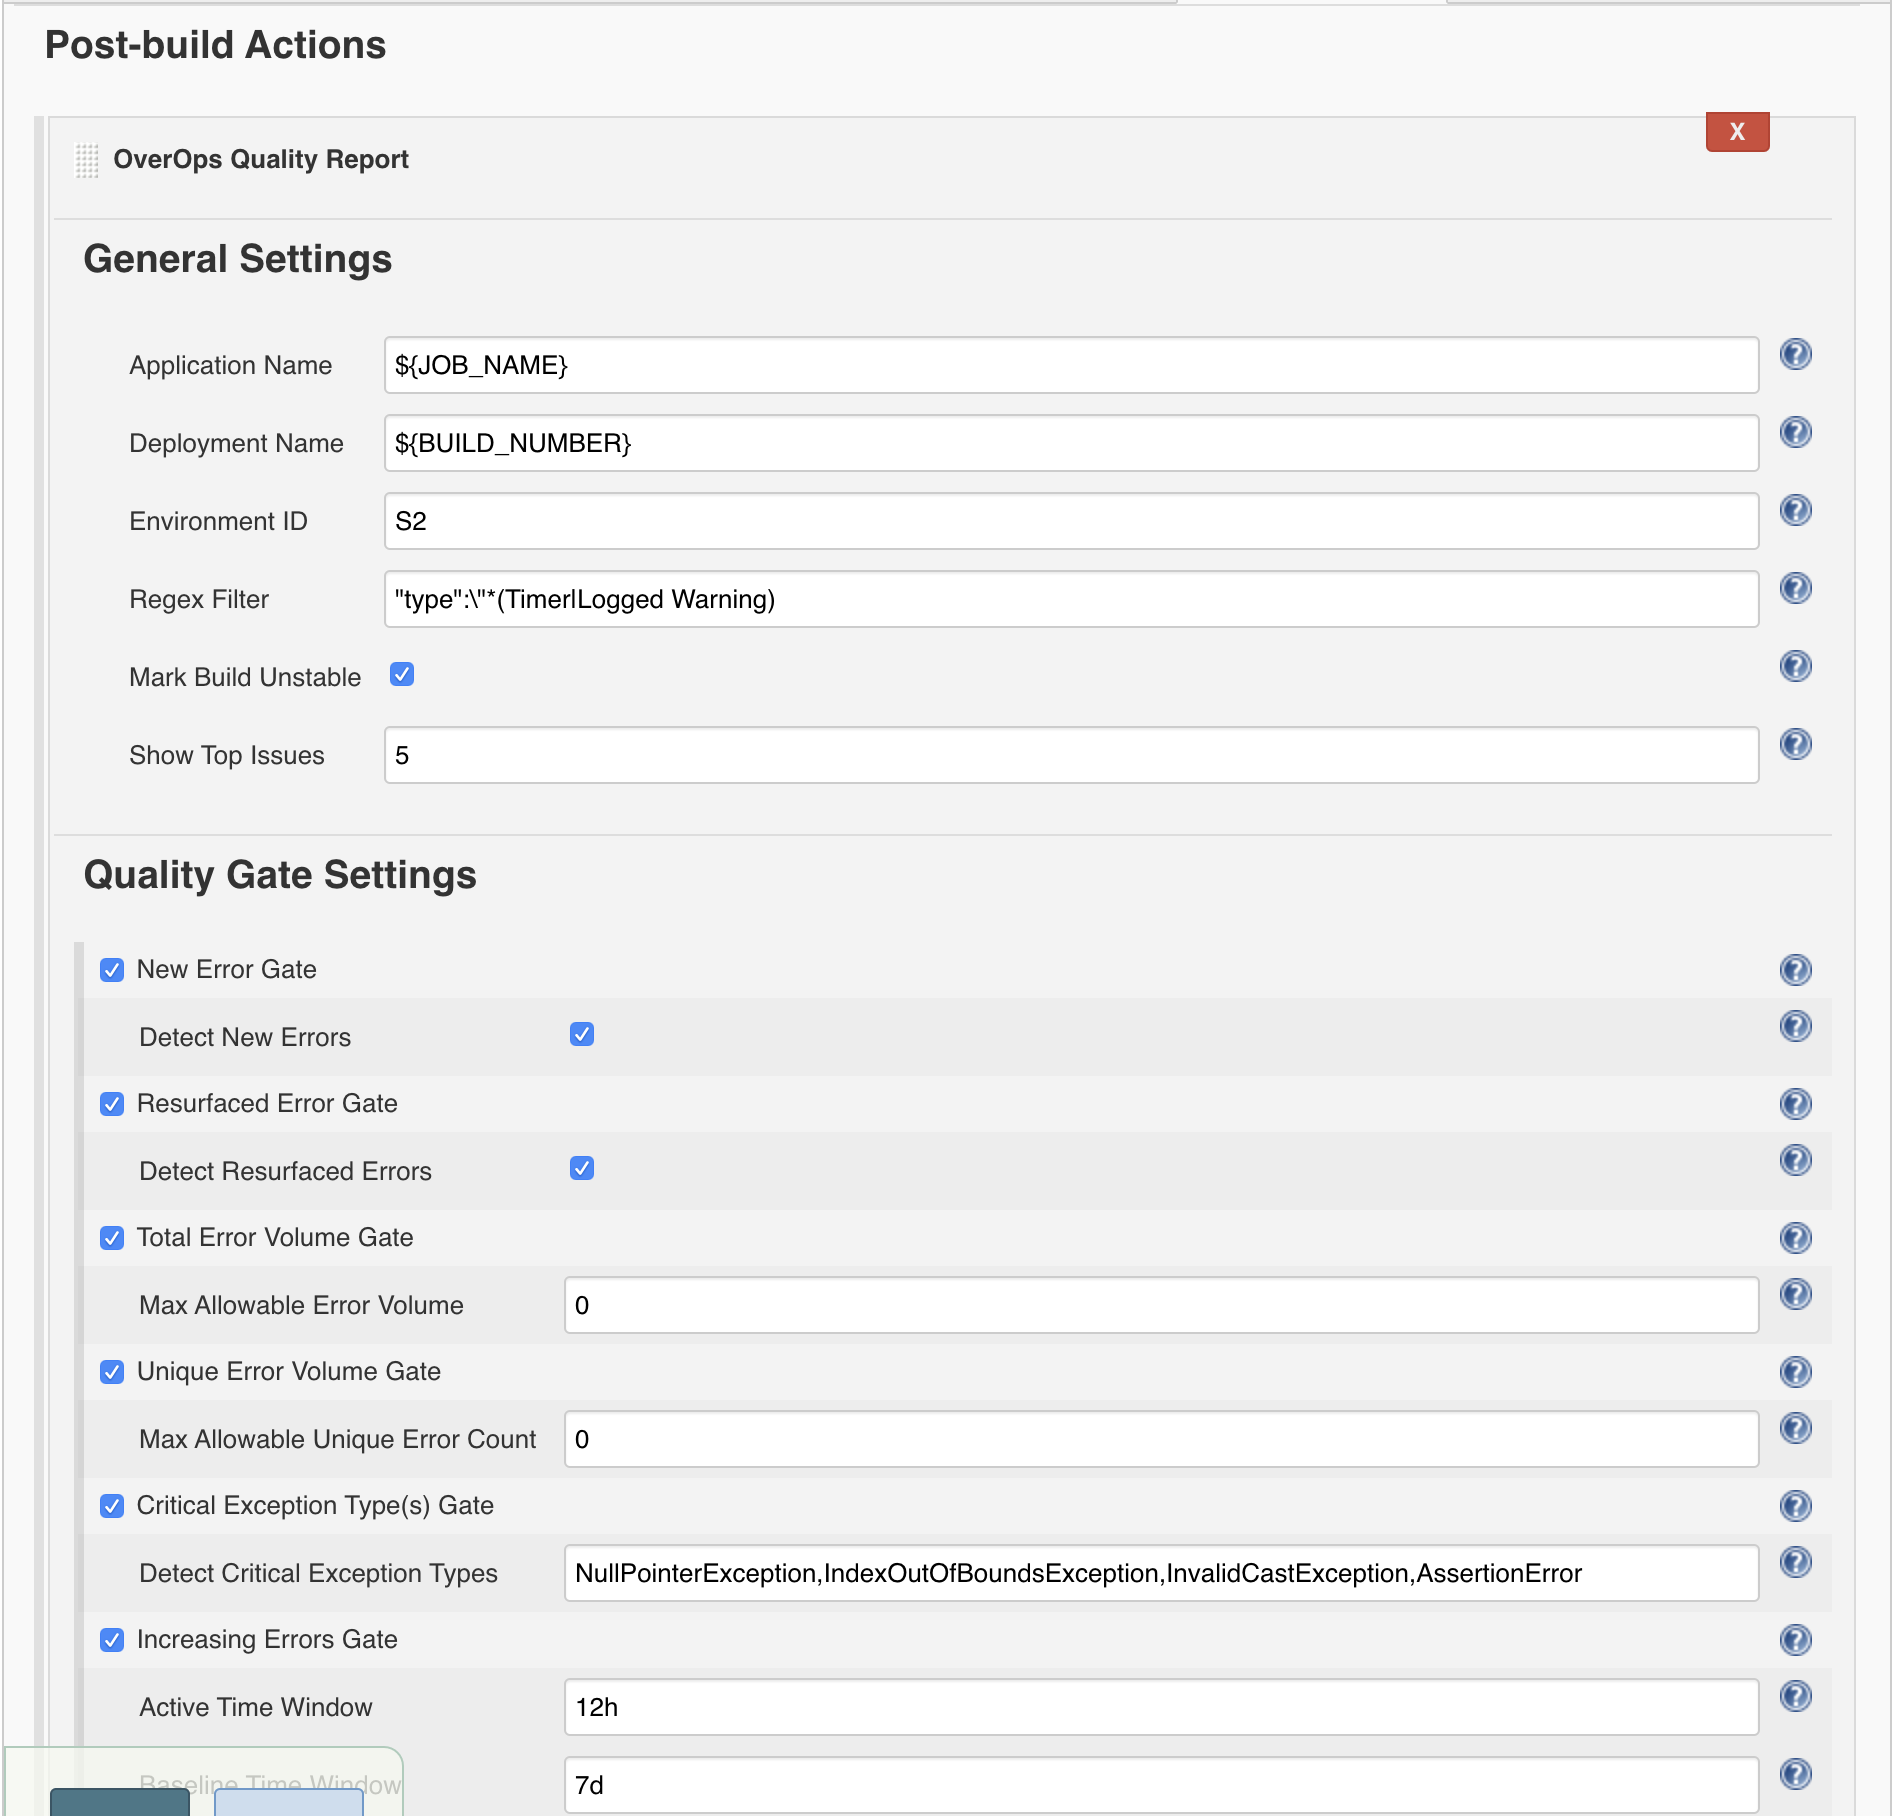
Now lets add the Quality Report to the Post-build Actions. Configure the quality gates of interest and click save.
Before we can build the Jenkins Job we need to add one thing to our Maven pom.xml. Remember the surefireArgLine property we added to the Maven step. We will use this property in our Maven POM file to attach the agent to the surefire plugin that will run our tests. See the image below on where to add the property.
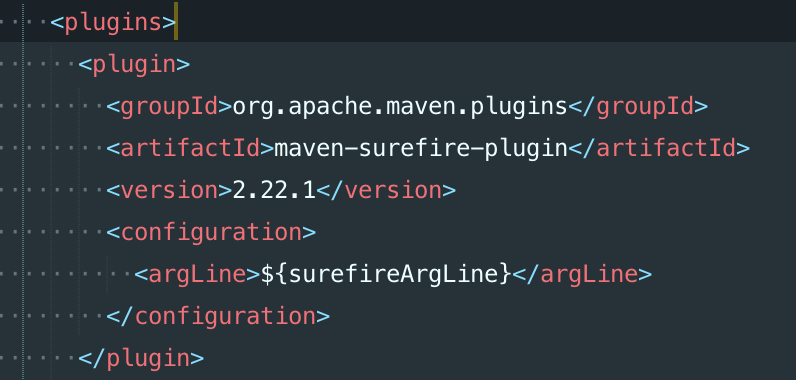
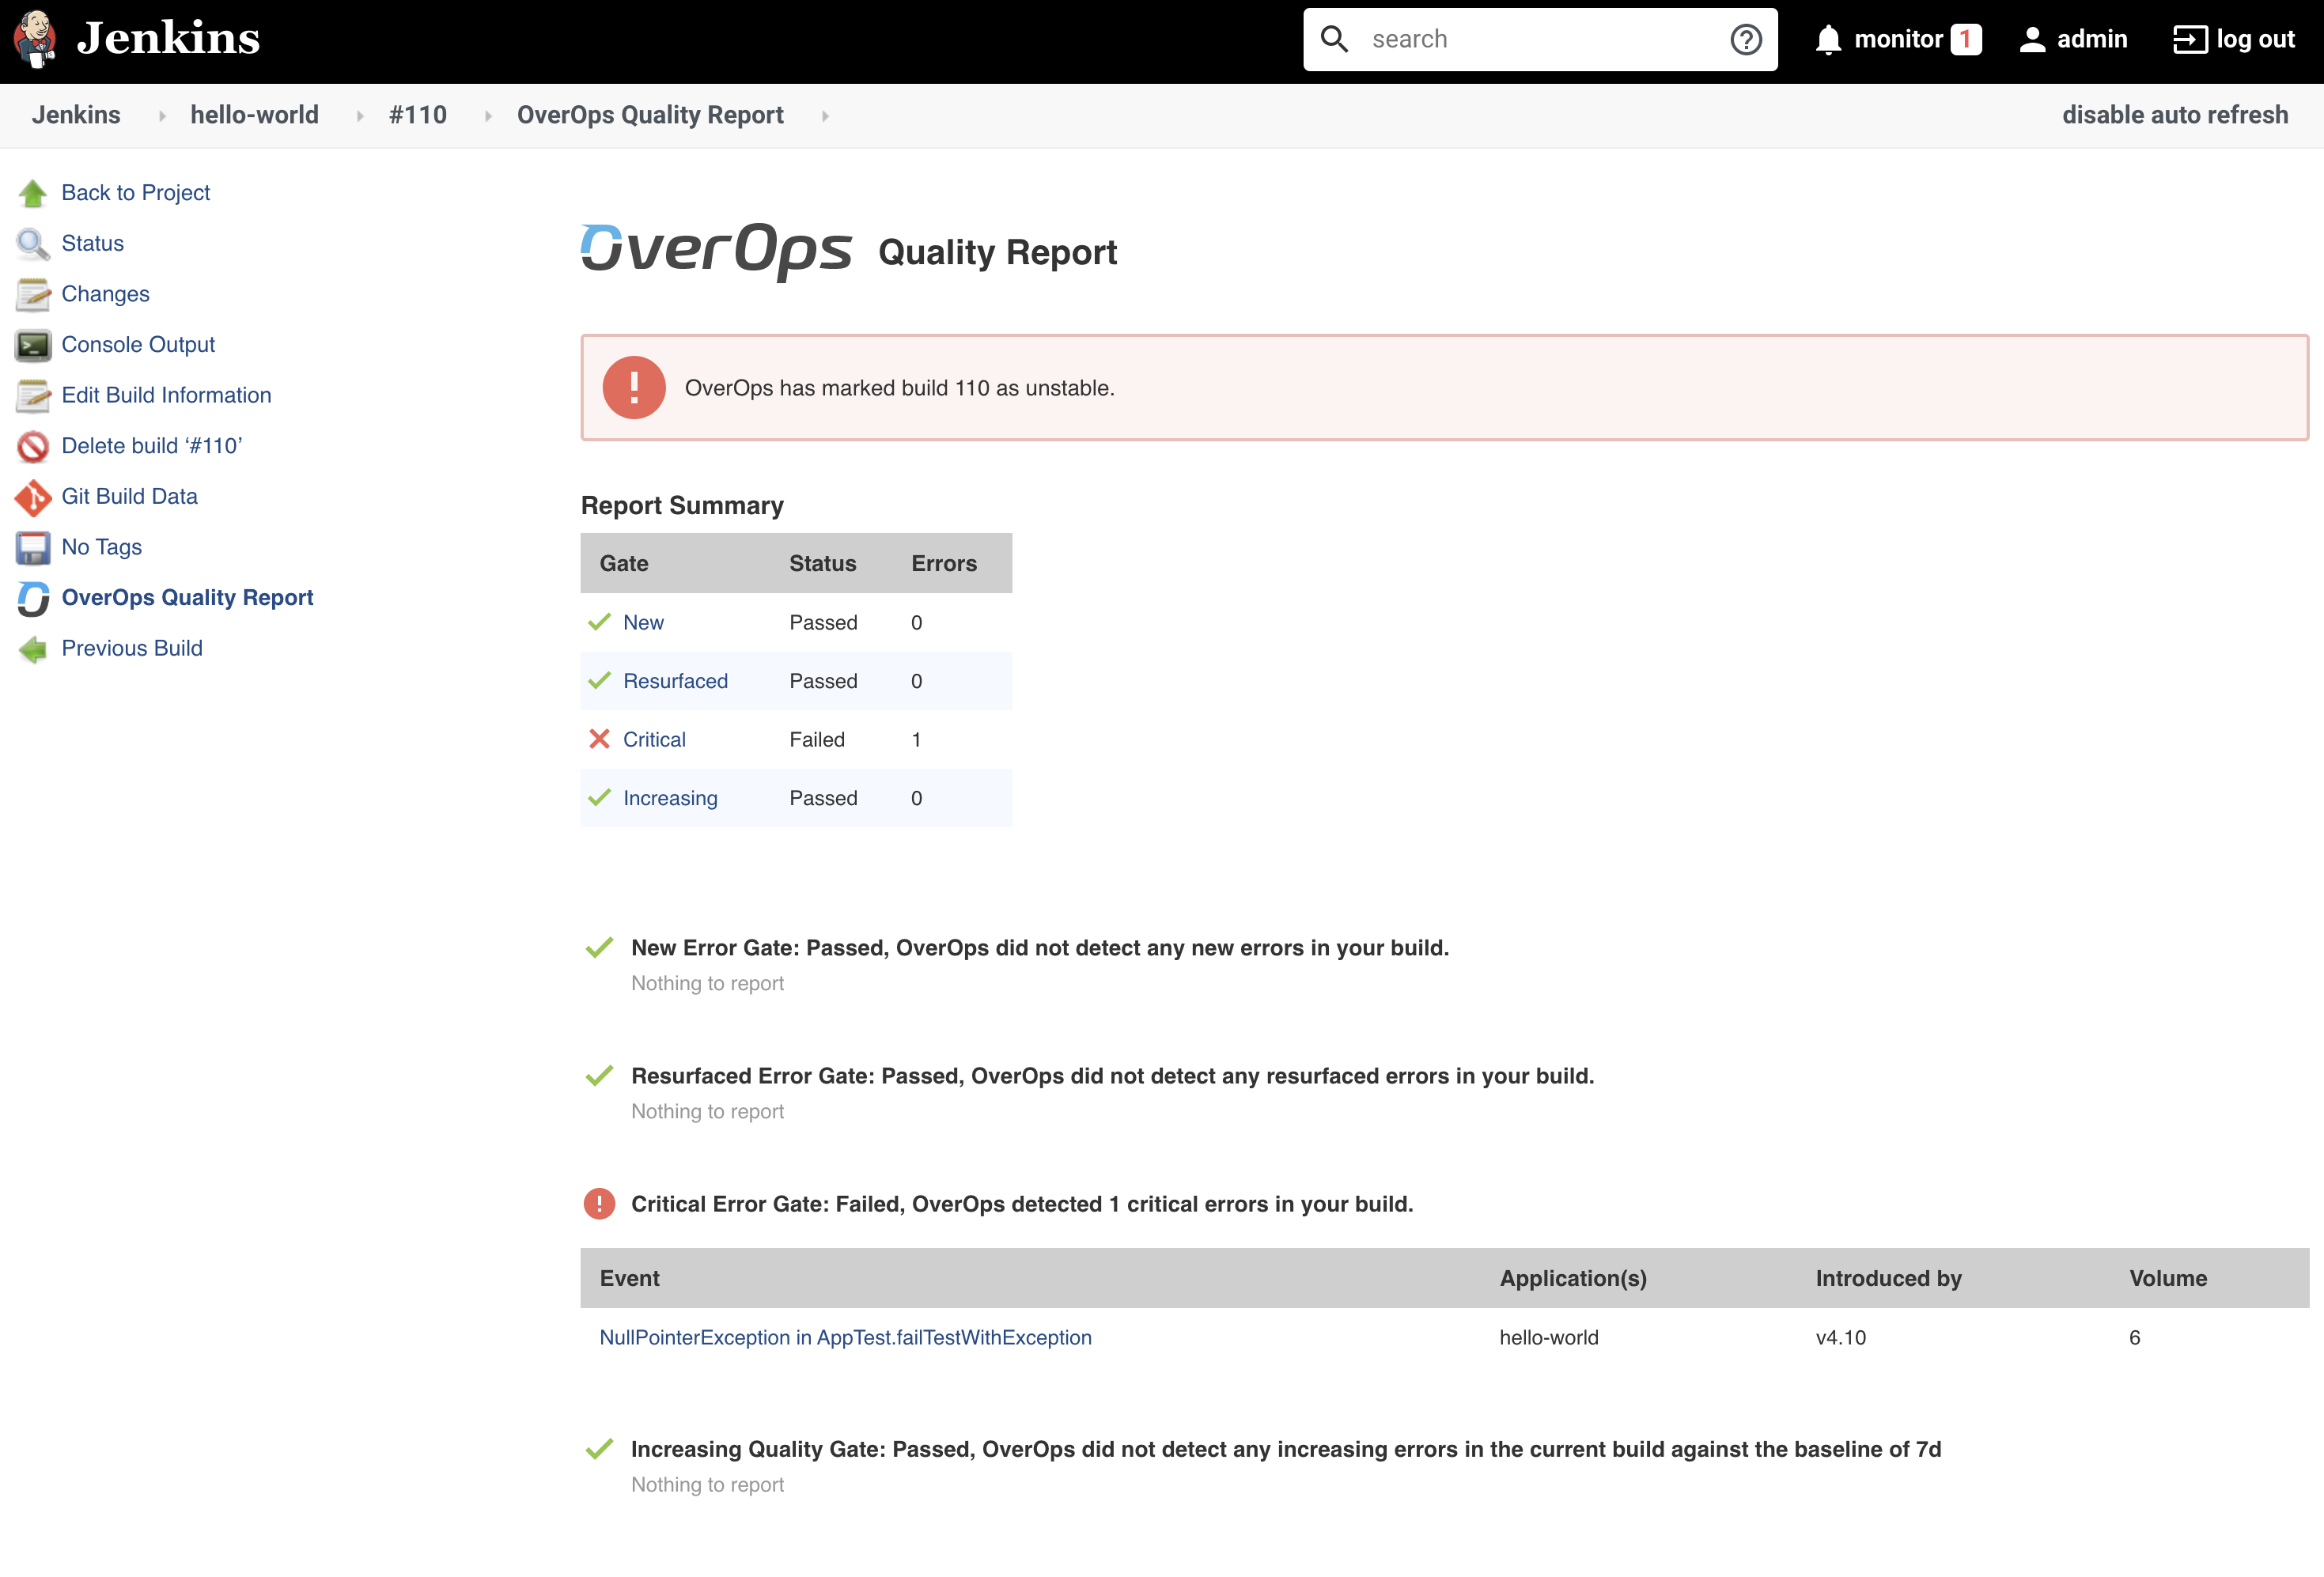
Once that change is made and pushed to your repository you can now Build the Jenkins Job. Once the Job is finished you should see an OverOps Quality Report link on the left side. Click the OverOps Quality Report link and you should see a report in the same likeness as the image below.
Automating the CI/CD Quality Gates Process for Bamboo
A Bamboo App is available to generate a Quality Report and prevent promotion of a build based on the status of configurable quality gates. As outlined above, the Micro-Agent will need to be attached during the test phase of your CI pipeline to collect the data used to generate the Quality Report. In this section, we'll show a detailed example of the full end-to-end setup required to generate an OverOps Quality Report in Bamboo. In the example below, we will be building a Java application using Maven with OverOps attached during the test phase.
Prerequisites
Before we begin, make sure your Collector is up and running and has successfully connected to the OverOps CR Server. Make a note of your Environment ID (e.g. S12345), your Collector's hostname and port, the CR Server's API URL (https://api.overops.com for SaaS), and your API Token. You'll also need to have admin access to your Bamboo server and have a Plan configured.
Install the App
In Bamboo, navigate to Bamboo administration → Manage apps. Click find new apps and search the Atlassian Marketplace for OverOps, or download the latest release and upload it directly by clicking upload app.
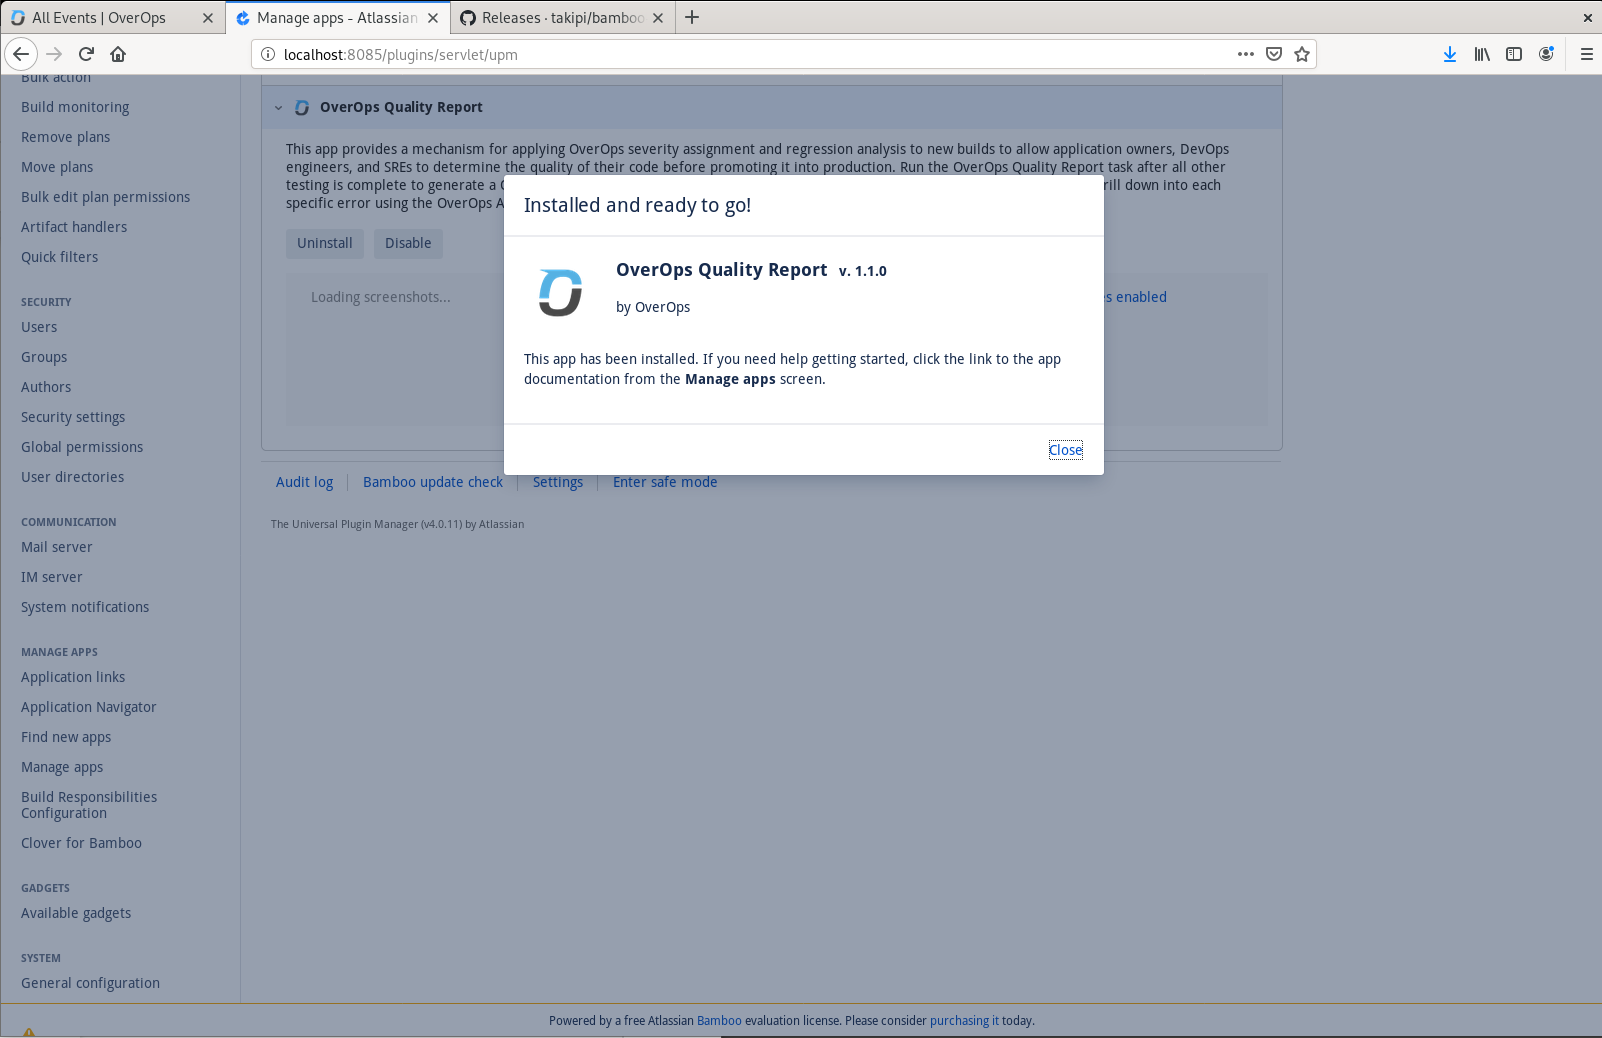
Successful installation of the OverOps Quality Report app in Bamboo
Configure the App
After installing the app, refresh the page and navigate to Settings, found in the OverOps section of Bamboo administration. Enter the API URL for your CR Server, along with your API Token and Environment ID. Click Test Connection to verify a successful connection, then click Save to save these settings.
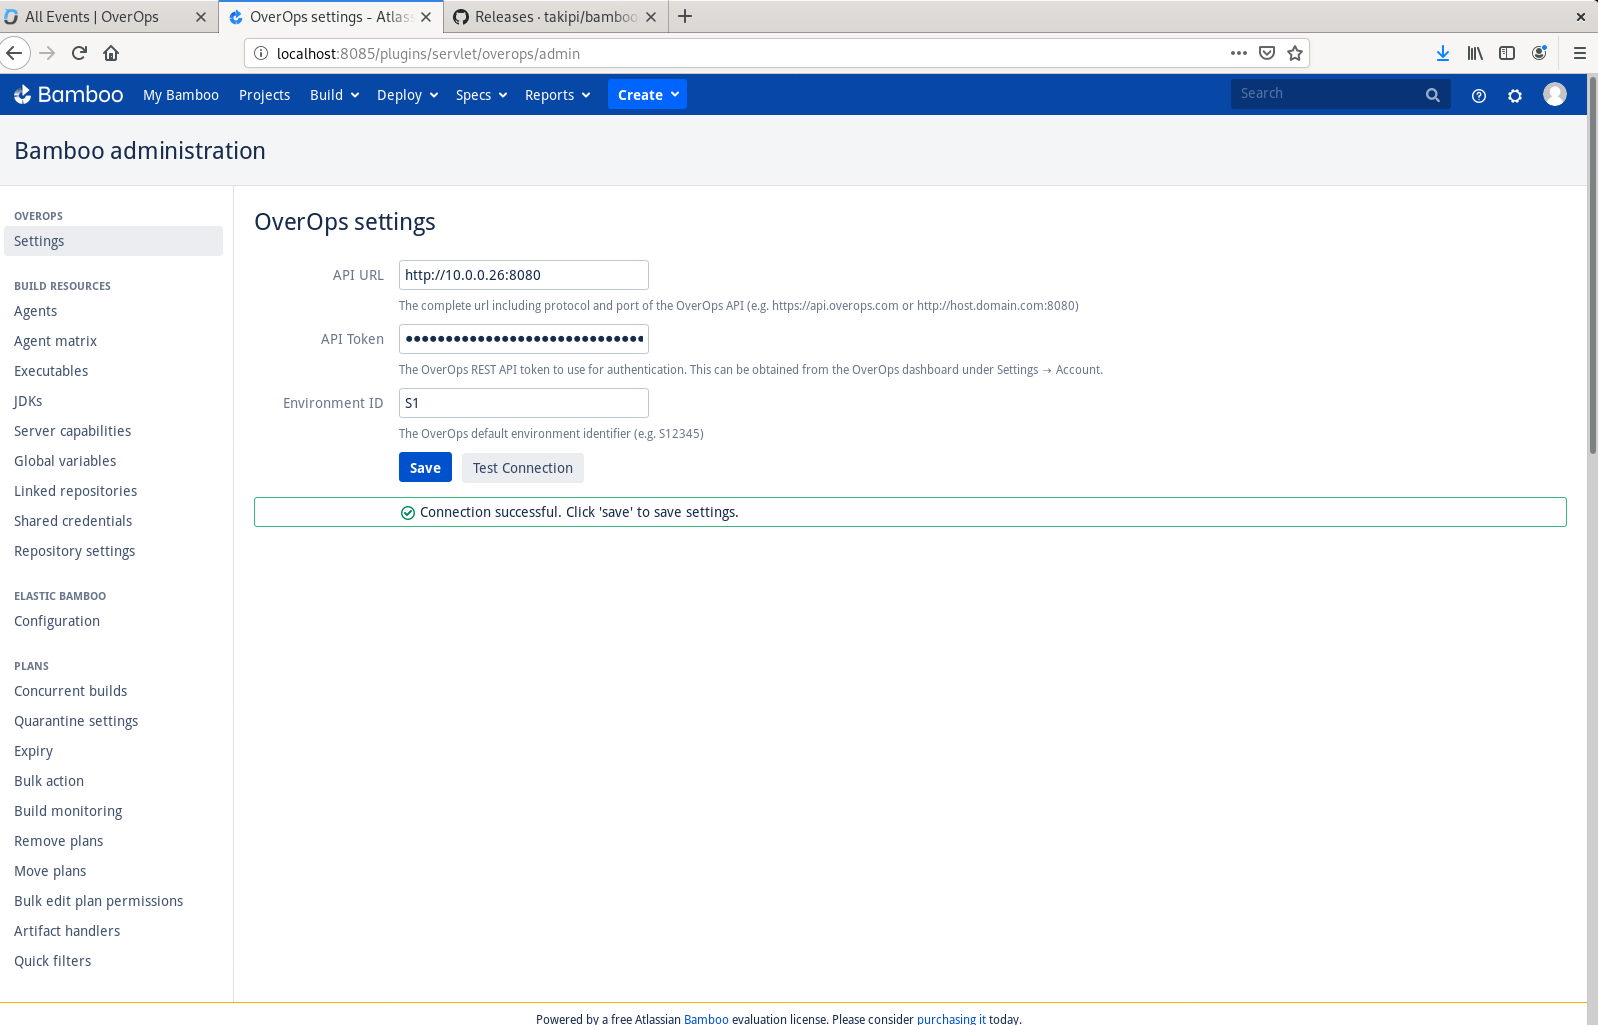
OverOps settings found in Bamboo administration
Configure the Plan
Navigate to the Job in your Plan where source code is checked out and unit tests are run. In this example, we'll check out code from GitHub and use Maven to run tests.
Add a new task to your Job. Click Add task, then search for and select Script.
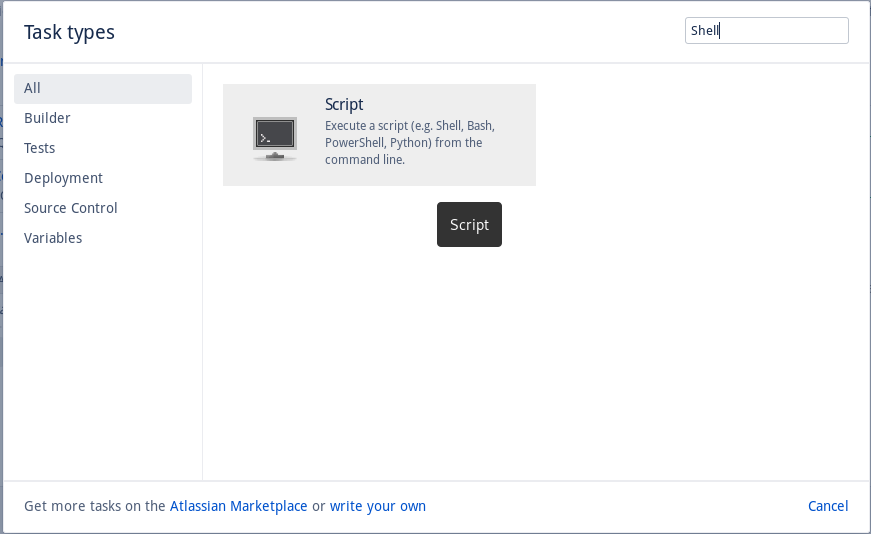
Add the Script Task to your Job
Give this task the description "Install OverOps Agent" and add the following script:
#!/bin/bash

# if agent exists, do nothing
# else, install the agent
if [ ! -d "/var/atlassian/application-data/bamboo/takipi" ]
then
  cd /var/atlassian/application-data/bamboo
  curl -sL https://s3.amazonaws.com/app-takipi-com/deploy/linux/takipi-agent-latest.tar.gz | tar -xvzf -
fi
This script downloads and installs the latest OverOps Micro-Agent on your Bamboo server if it hasn't already been installed.
Docker containersFor this example, we're running jobs in the Bamboo Agent environment. If you're using Docker containers to run Bamboo jobs, the OverOps Micro-Agent needs to be installed inside your container at build time by adding it in your Dockerfile.
If you haven't already done so, add a task to check out your source code from a repository.
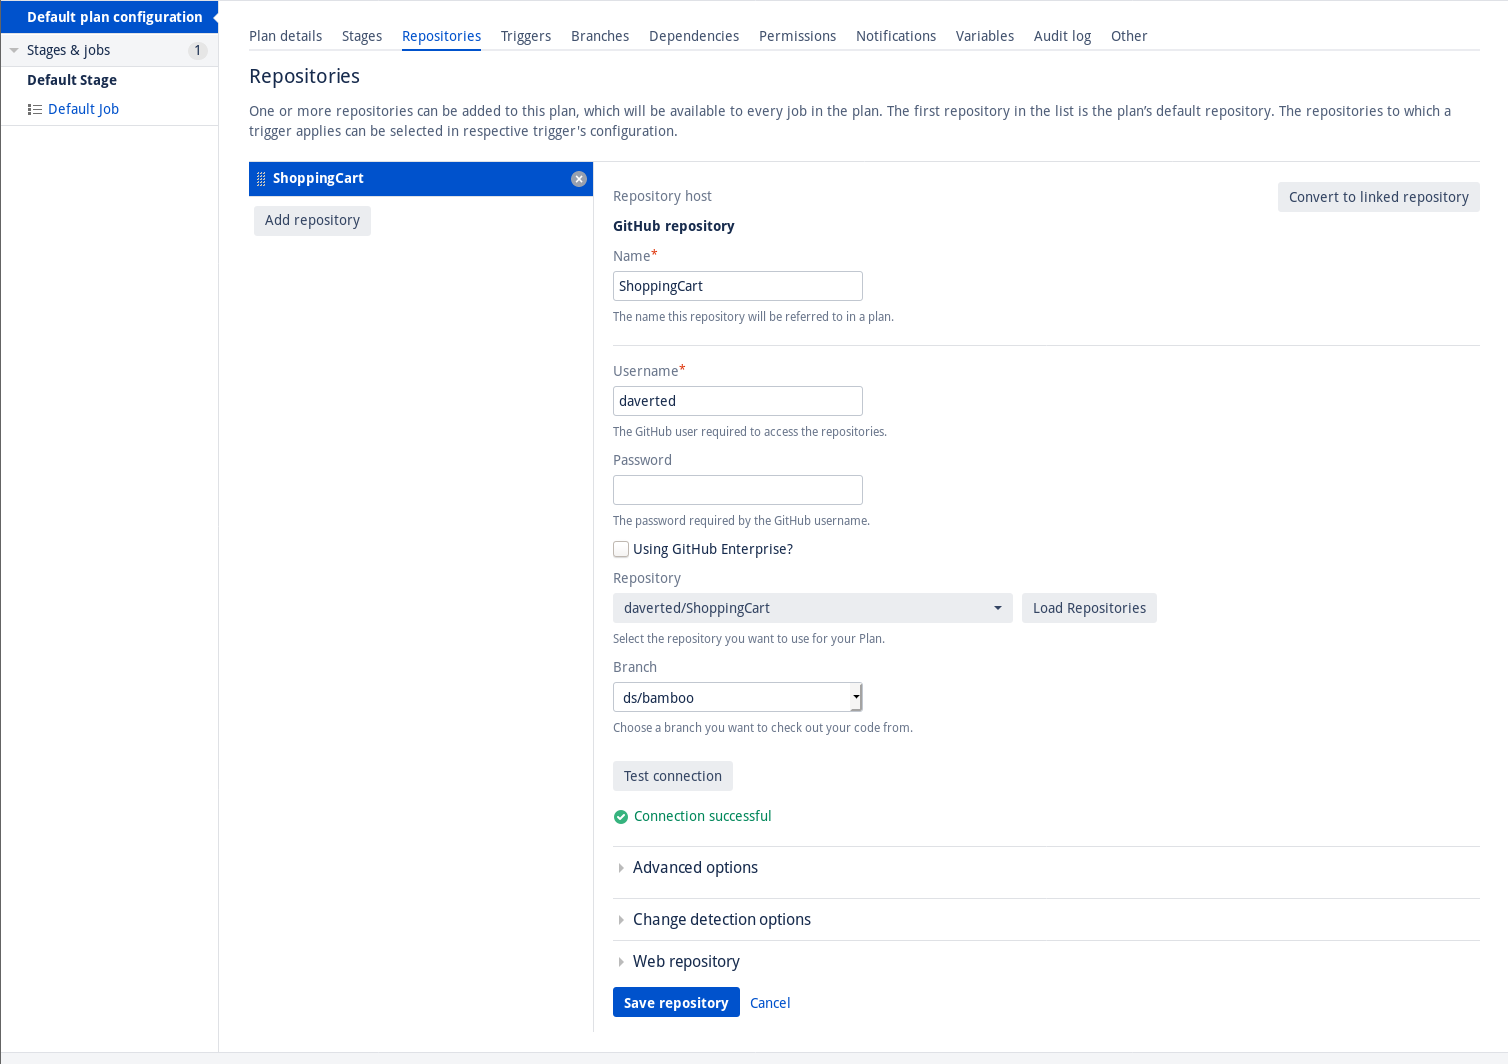
We've set up a GitHub repository from which we'll check out source code
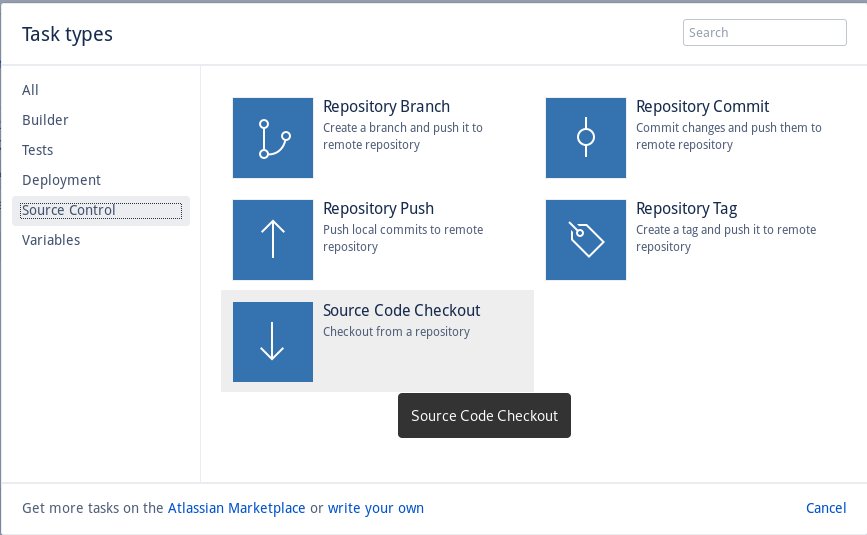
The Source Code Checkout task gets the latest code from the repository
If you haven't already done so, add a task to build and test the code.
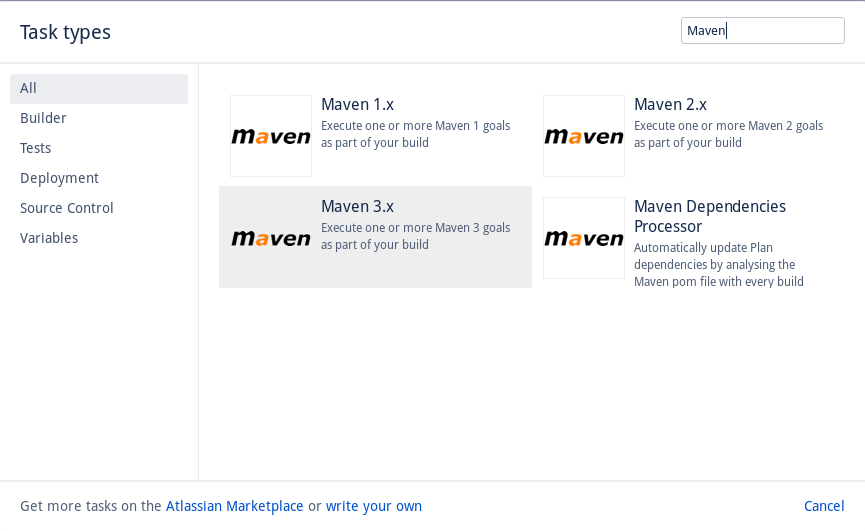
We've added the Maven 3.x task, which will be used to build our code and run tests
We'll need to attach the OverOps Micro-Agent to Maven task to enable collection of data during unit testing. To do this, we add the -DargLine parameter to the Maven Goal:
-DargLine="-agentpath:/var/atlassian/application-data/bamboo/takipi/lib/libTakipiAgent.so=takipi.debug.logconsole,takipi.application.name=${bamboo.planKey},takipi.deployment.name=${bamboo.buildResultKey},takipi.shutdown.gracetime=20000" clean testBreaking this down, agentpath is the location of the OverOps Micro-Agent which we installed earlier using a shell script. takipi.application.name=${bamboo.planKey} sets the Application name in OverOps to the Plan Key in Bamboo. takipi.deployment.name=${bamboo.buildResultKey} sets the Deployment name in OverOps to the Build Result Key in Bamboo. These will be referenced again later in the Quality Report task.
We'll also need to set two environment variables: TAKIPI_COLLECTOR_HOST and TAKIPI_COLLECTOR_PORT. These variables are the hostname and port of your Collector.
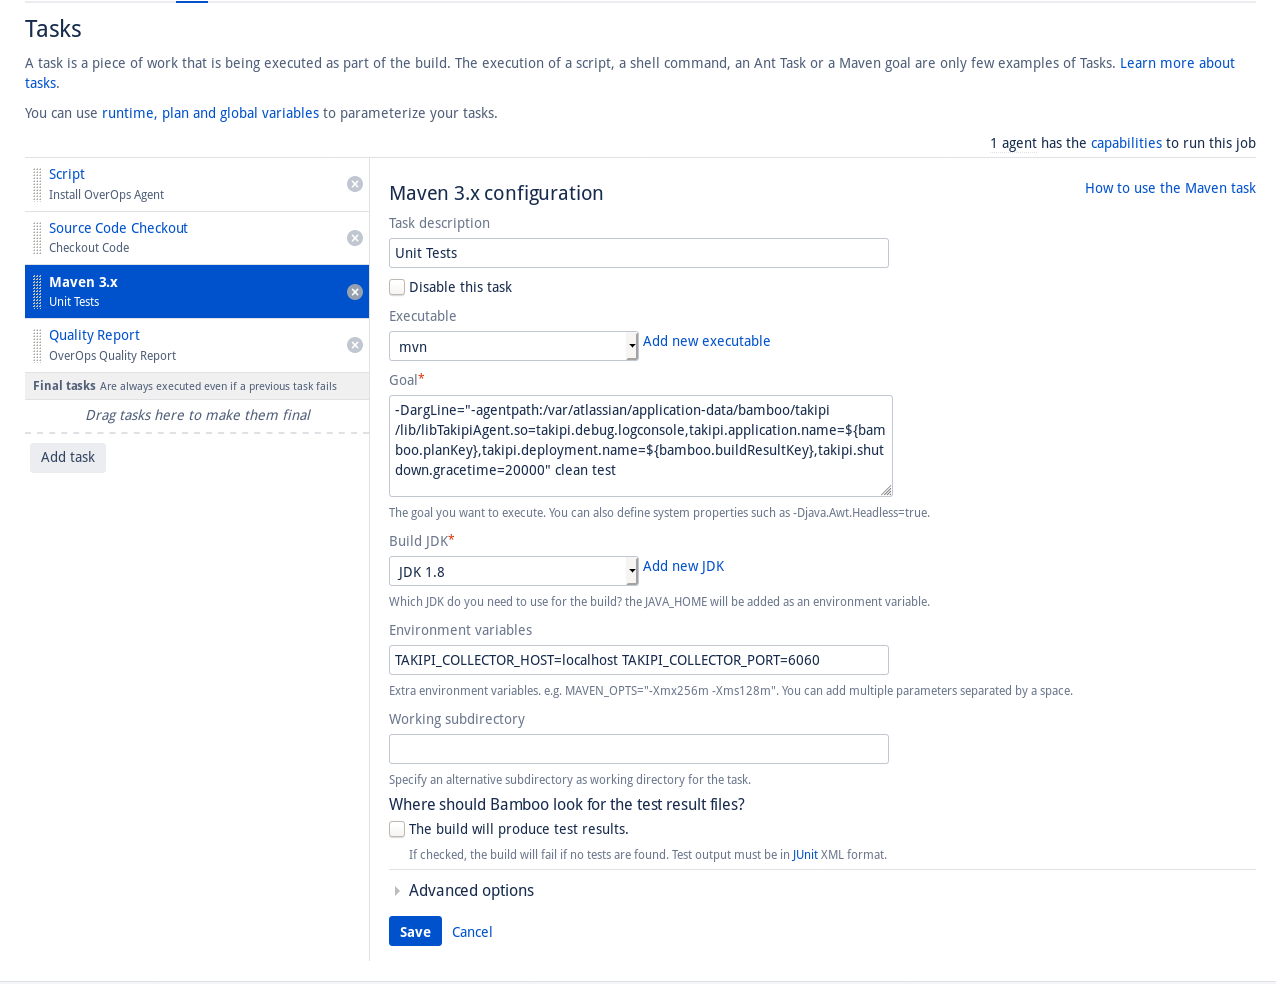
We've configured Maven to attach the OverOps Micro-Agent, set Application and Deployment names, and connect to a Collector
Next, we'll add the OverOps Quality Report task. Add a new task, search for and select OverOps Quality Report.
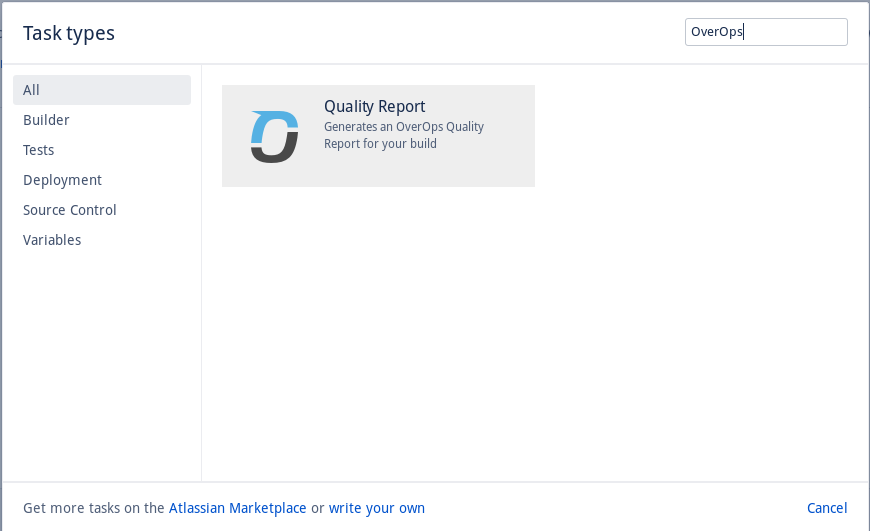
Add the OverOps Quality Report task
Configure the Quality Report task, setting Application Name to ${bamboo.planKey} and Deployment Name to ${bamboo.buildResultKey}. Enable and configure quality gates of interest.
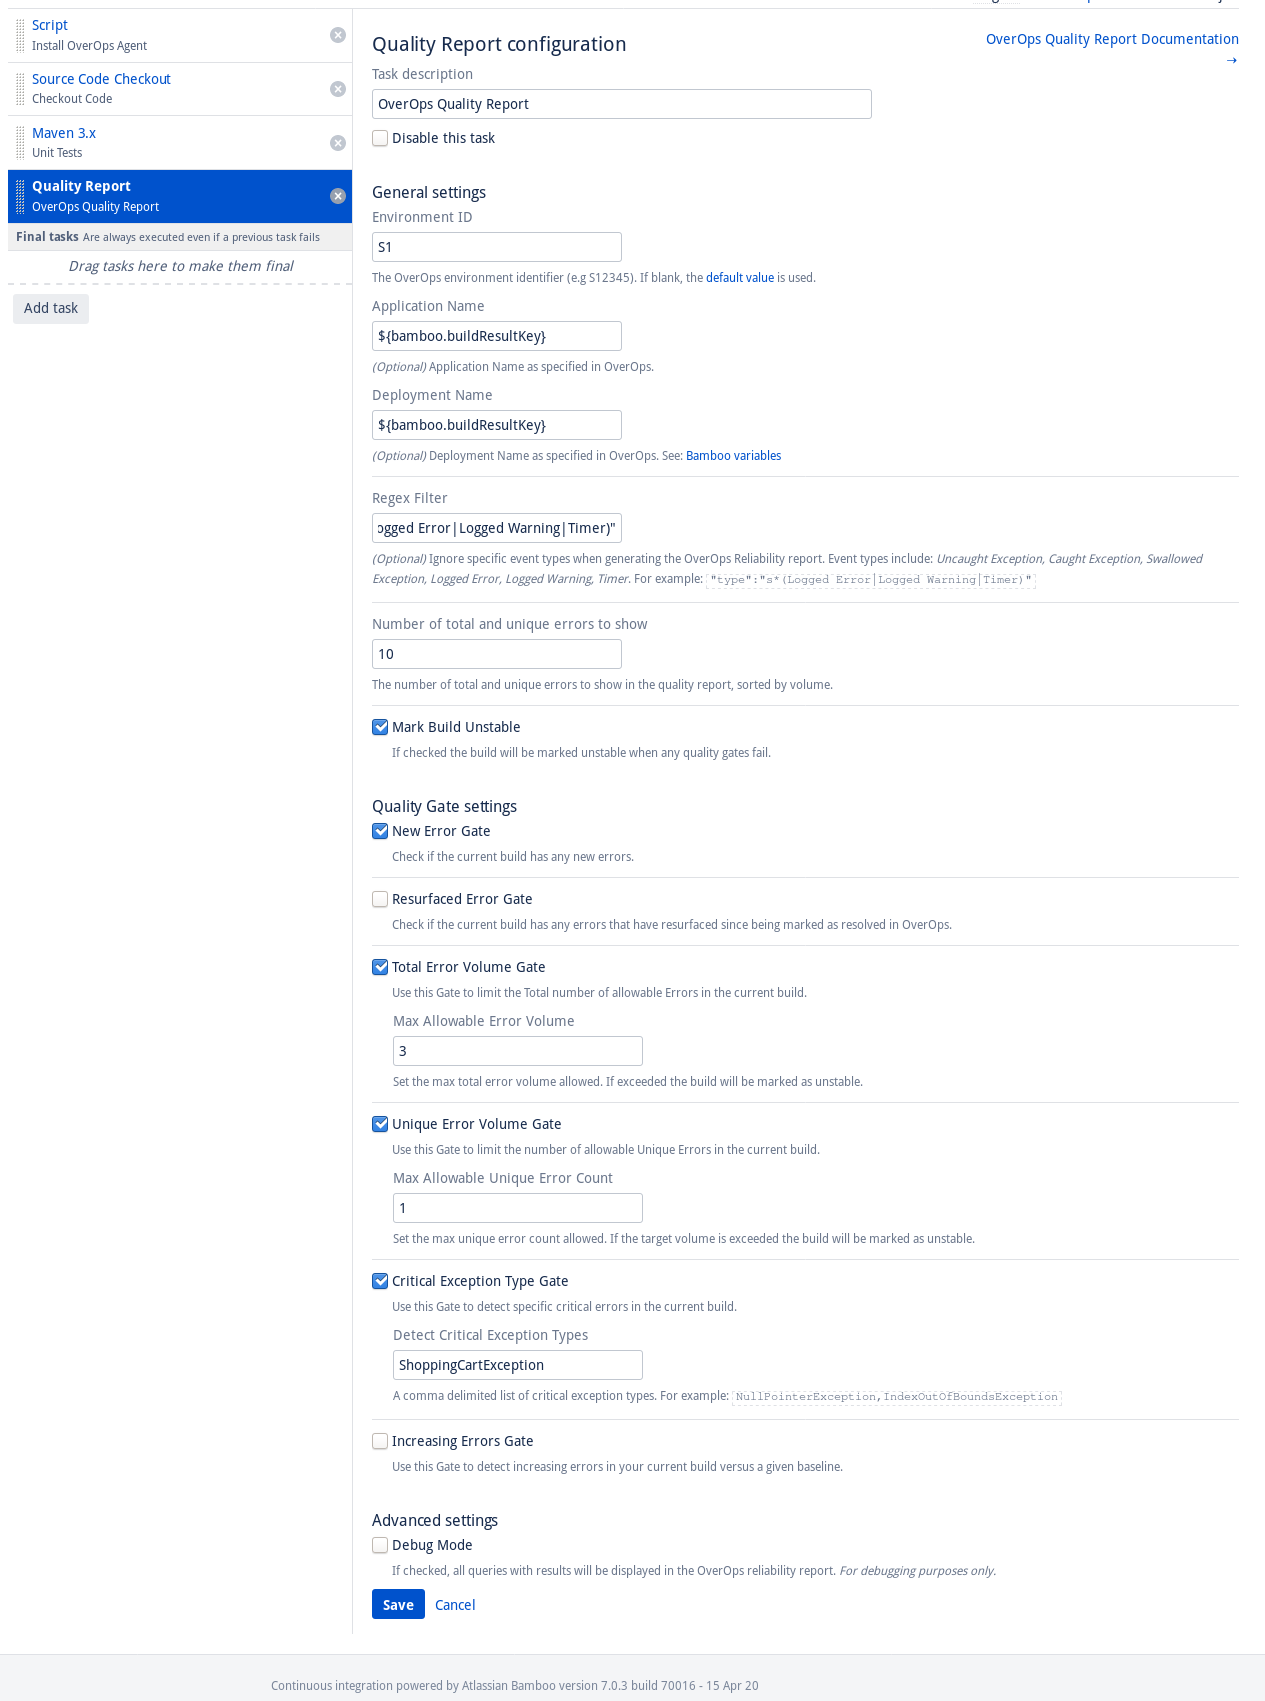
Configure the OverOps Quality Report
Ensure your tasks are in the following order:
- Script - Install OverOps Micro-Agent
- Checkout Code
- Run unit tests with OverOps Micro-Agent attached
- Generate OverOps Quality Report
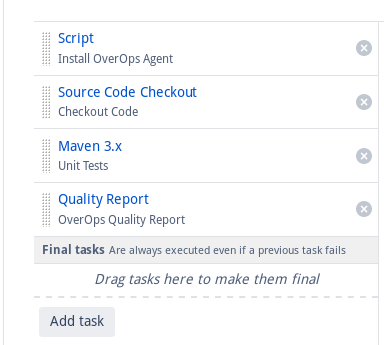
Ensure Tasks are in the correct order
Run the Plan. Navigate to the OverOps Quality Report tab from the build results summary page to see your Quality Report.
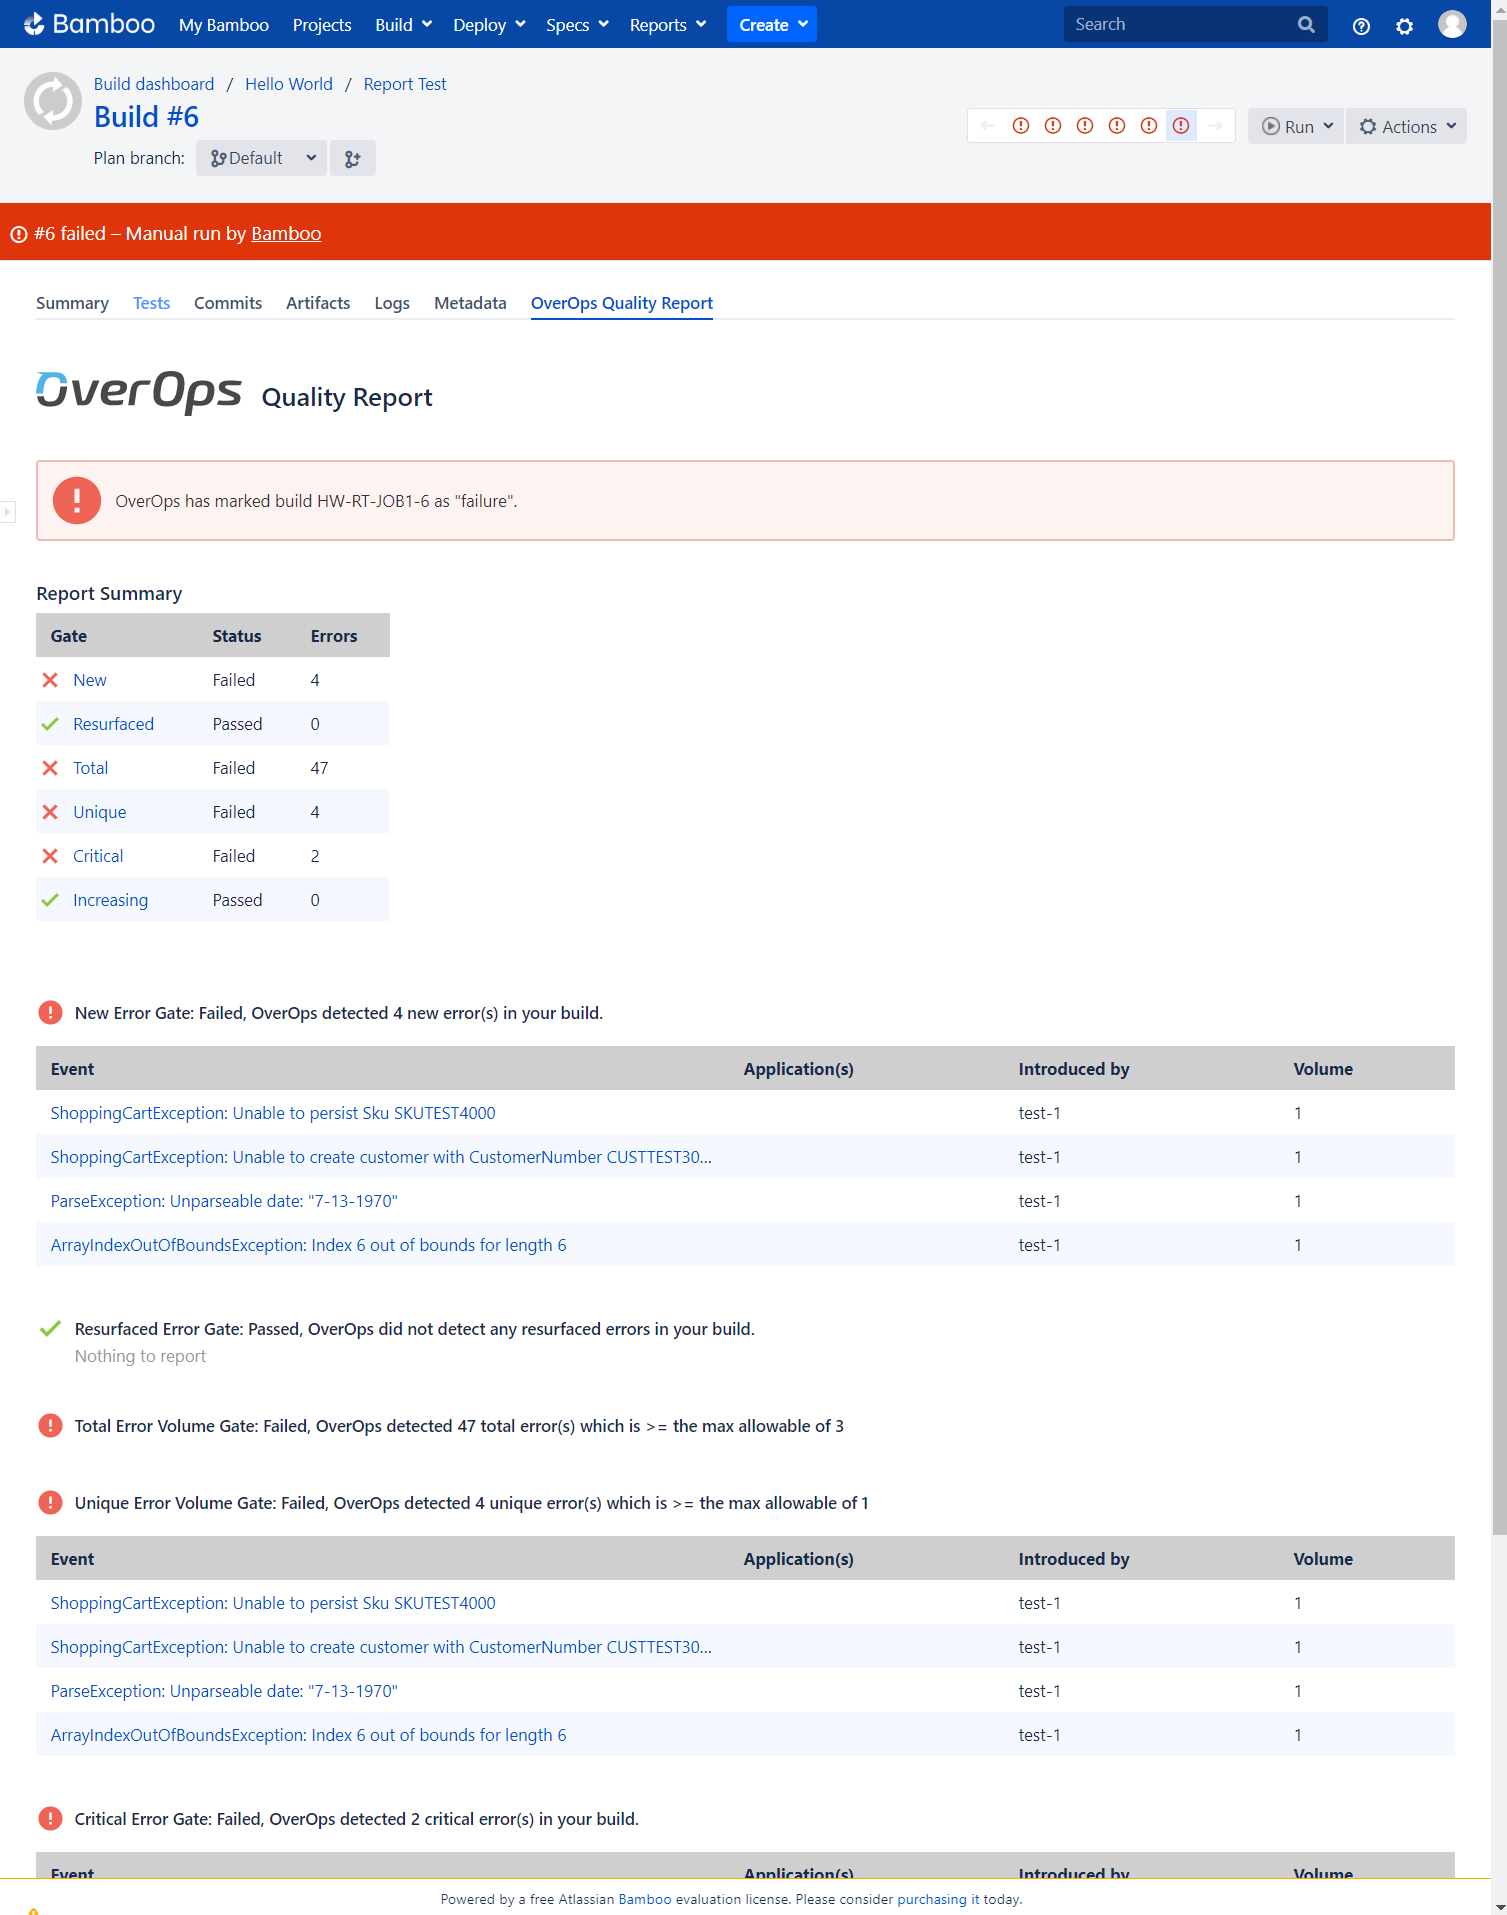
The OverOps Quality Report for this build
Automating the CI/CD Quality Gates Process for GitLab
A GitLab Docker container is available to generate a Quality Report and prevent the promotion of a build based on the status of configurable quality gates. As outlined above, the Micro-Agent will need to be attached during the test phase of your CI pipeline to collect the data used to generate the Quality Report. In this section, we'll show a detailed example of the full end-to-end setup required to generate an OverOps Quality Report in GitLab. In the example below, we will be building a Java application using Maven with OverOps attached during the test phase.
Prerequisites
Before we begin, make sure your Collector is up and running and has successfully connected to the OverOps CR Server. Make a note of your Environment ID (e.g. S12345), your Collector's hostname and port, the CR Server's API URL (https://api.overops.com for SaaS), and your API Token. You'll also need to have admin access to your GitLab project.
Configure Variables
GitLab uses the .gitlab-ci.yml file to define a build pipeline which is checked into your repository. Since it is checked in there will be certain properties that you want to protect. To do this navigate to your project’s Settings -> CI/CD page.
The following variables are recommended to be protected:
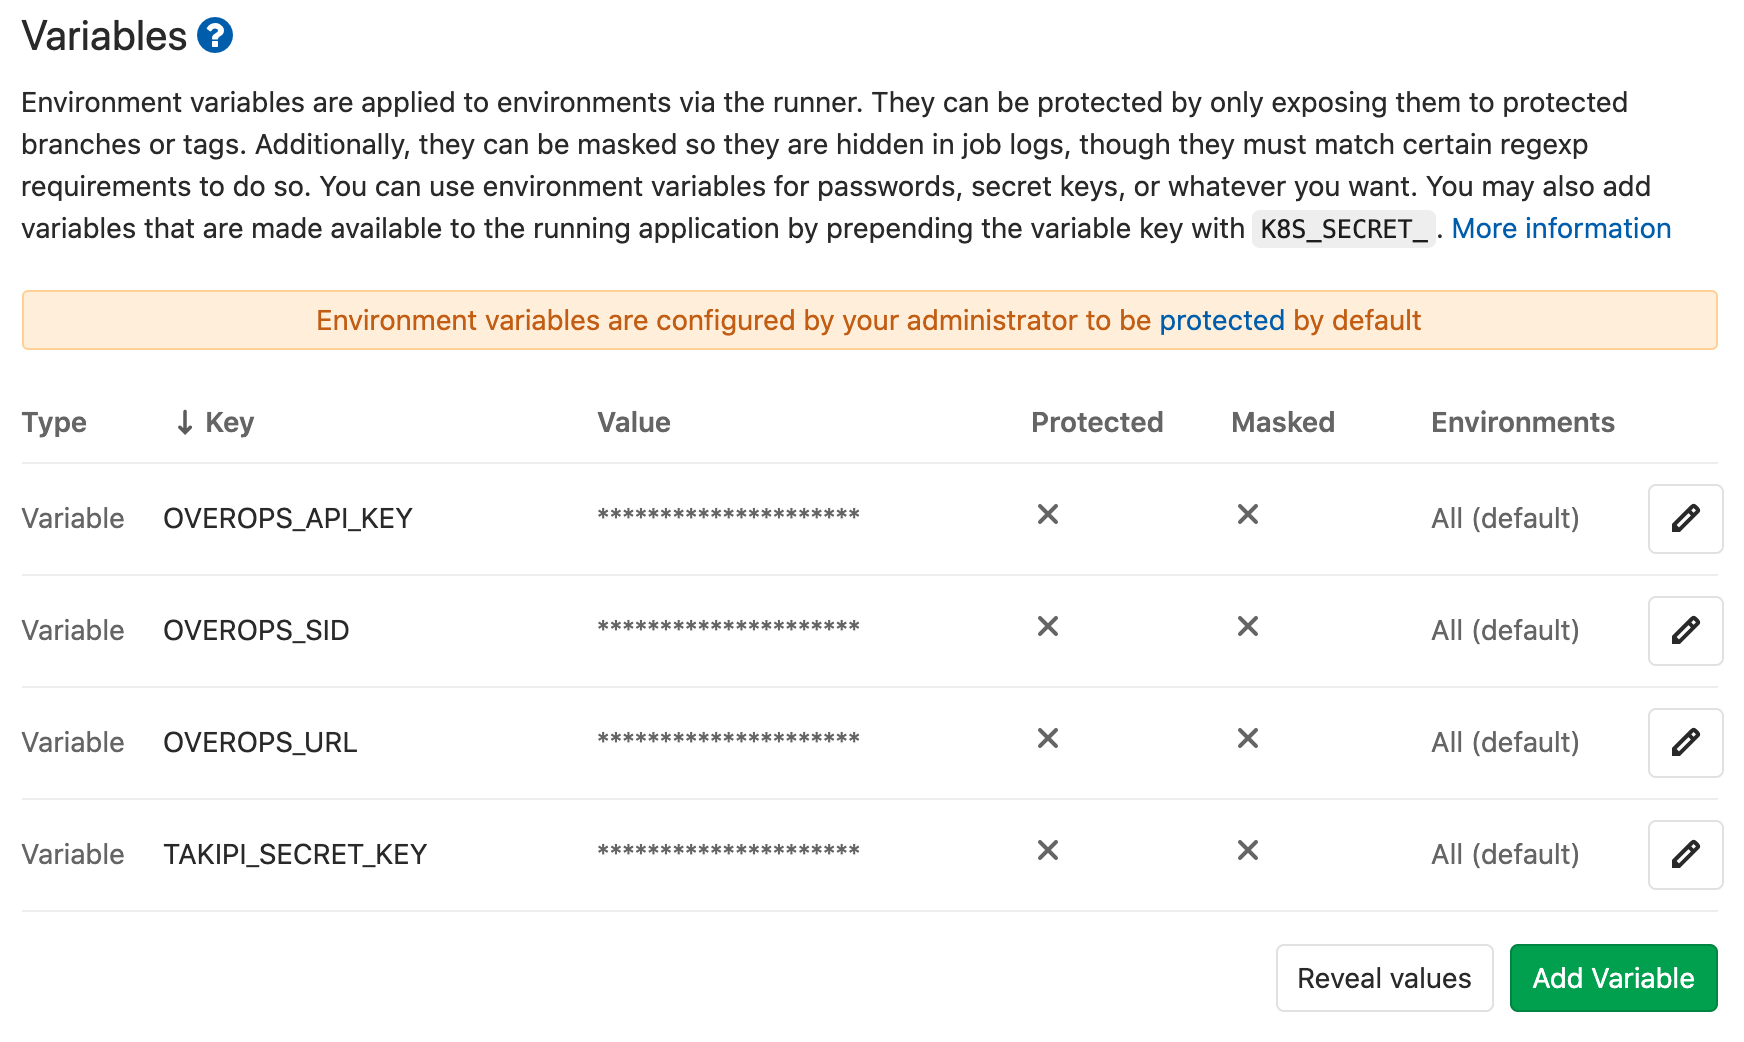
Settings -> CI -> Variables
Key | Value |
|---|---|
TAKIPI_SECRET_KEY | Full Installation Key |
OVEROPS_API_KEY | API Token |
OVEROPS_SID | S#### |
OVEROPS_URL | API Service URL |
Configure the Pipeline
GitLab uses the .gitlab-ci.yml file to define a build pipeline. Below is an example of a pipeline with two jobs; the test job and overops job. The test job will run the Maven build with an Agent attached throwing events to the OverOps backend. The overops job will execute the report generator to generate a Quality Report.
image: overops/overops-gitlab-plugin:dev

variables:
  TAKIPI_BASE_URL: https://backend.overops.com
  TAKIPI_LISTEN_PORT: 6060
  TAKIPI_SECRET_KEY: $TAKIPI_SECRET_KEY

  OVEROPS_APPLICATION_NAME: ${CI_PROJECT_NAME}
  OVEROPS_DEPLOYMENT_NAME: job-${CI_COMMIT_SHORT_SHA}
  OVEROPS_MARK_UNSTABLE: "false"
  OVEROPS_NEW_EVENTS: "true"
  OVEROPS_RESURFACED_ERRORS: "true"
  OVEROPS_MAX_ERROR_VOLUME: 5
  OVEROPS_MAX_UNIQUE_ERRORS: 5
  OVEROPS_CRITICAL_EXCEPTION_TYPES: "ExampleUncaughtException, SAXParseException"
  OVEROPS_PRINT_TOP_ISSUES: 5
  OVEROPS_SHOW_EVENTS_FOR_PASSED_GATES: "true"
  OVEROPS_DEBUG: "true"

stages:
  - test
  - overops

test:
 stage: test
 services:
   - overops/collector:4.48.0
 script:
   - wget --content-disposition https://app.overops.com/app/download?t=sa-tgz
   - tar xvzf takipi-agent-*.tar.gz

   - echo takipi.deployment.name=job-${CI_COMMIT_SHORT_SHA} > takipi/agent.properties
   - echo takipi.application.name=${CI_PROJECT_NAME} >> takipi/agent.properties
   - echo takipi.collector.host=overops-collector >> takipi/agent.properties
   - echo takipi.collector.port=${TAKIPI_LISTEN_PORT} >> takipi/agent.properties
   - echo shutdownGraceTime=20000 >> takipi/agent.properties

   - ./mvnw -DargLine=-agentpath:./takipi/lib/libTakipiAgent.so test

overops:
  stage: overops
  when: on_success
  allow_failure: false
  artifacts:
    name: "OverOps Quality Report $CI_JOB_ID"
    when: always
    paths:
      - quality-report.html
    untracked: true
    expire_in: 90 days
  script:
   - /opt/run-quality-report.sh
Viewing the Quality Report
Navigate to the pipeline of your choice and click on the Overops job.
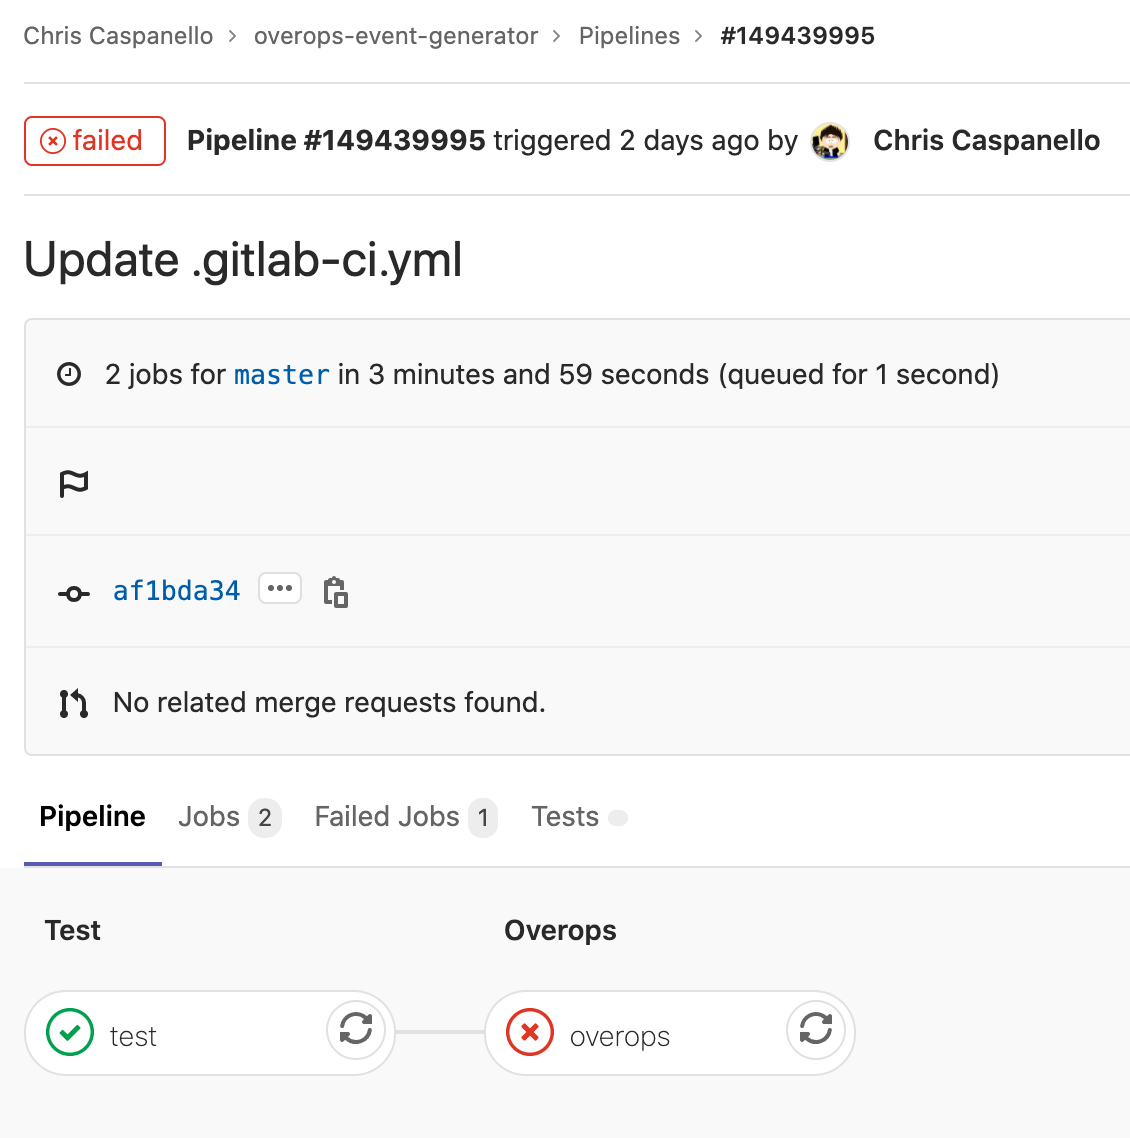
GitLab Pipeline
On the right side you will see a section for Job artifacts click the browse button
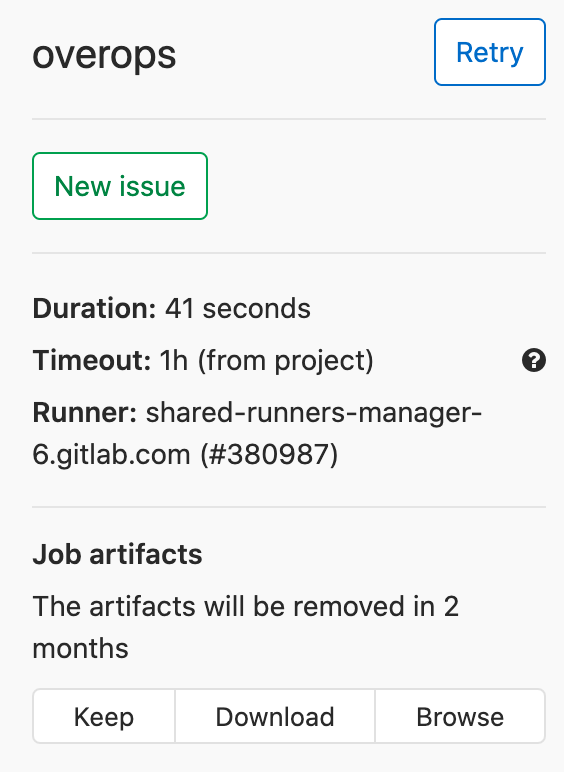
OverOps Browse Button
This will list any artifacts published by the job. Here you can click the quality-report.html link. The report will display in GitLab Pages.

Job Artifacts
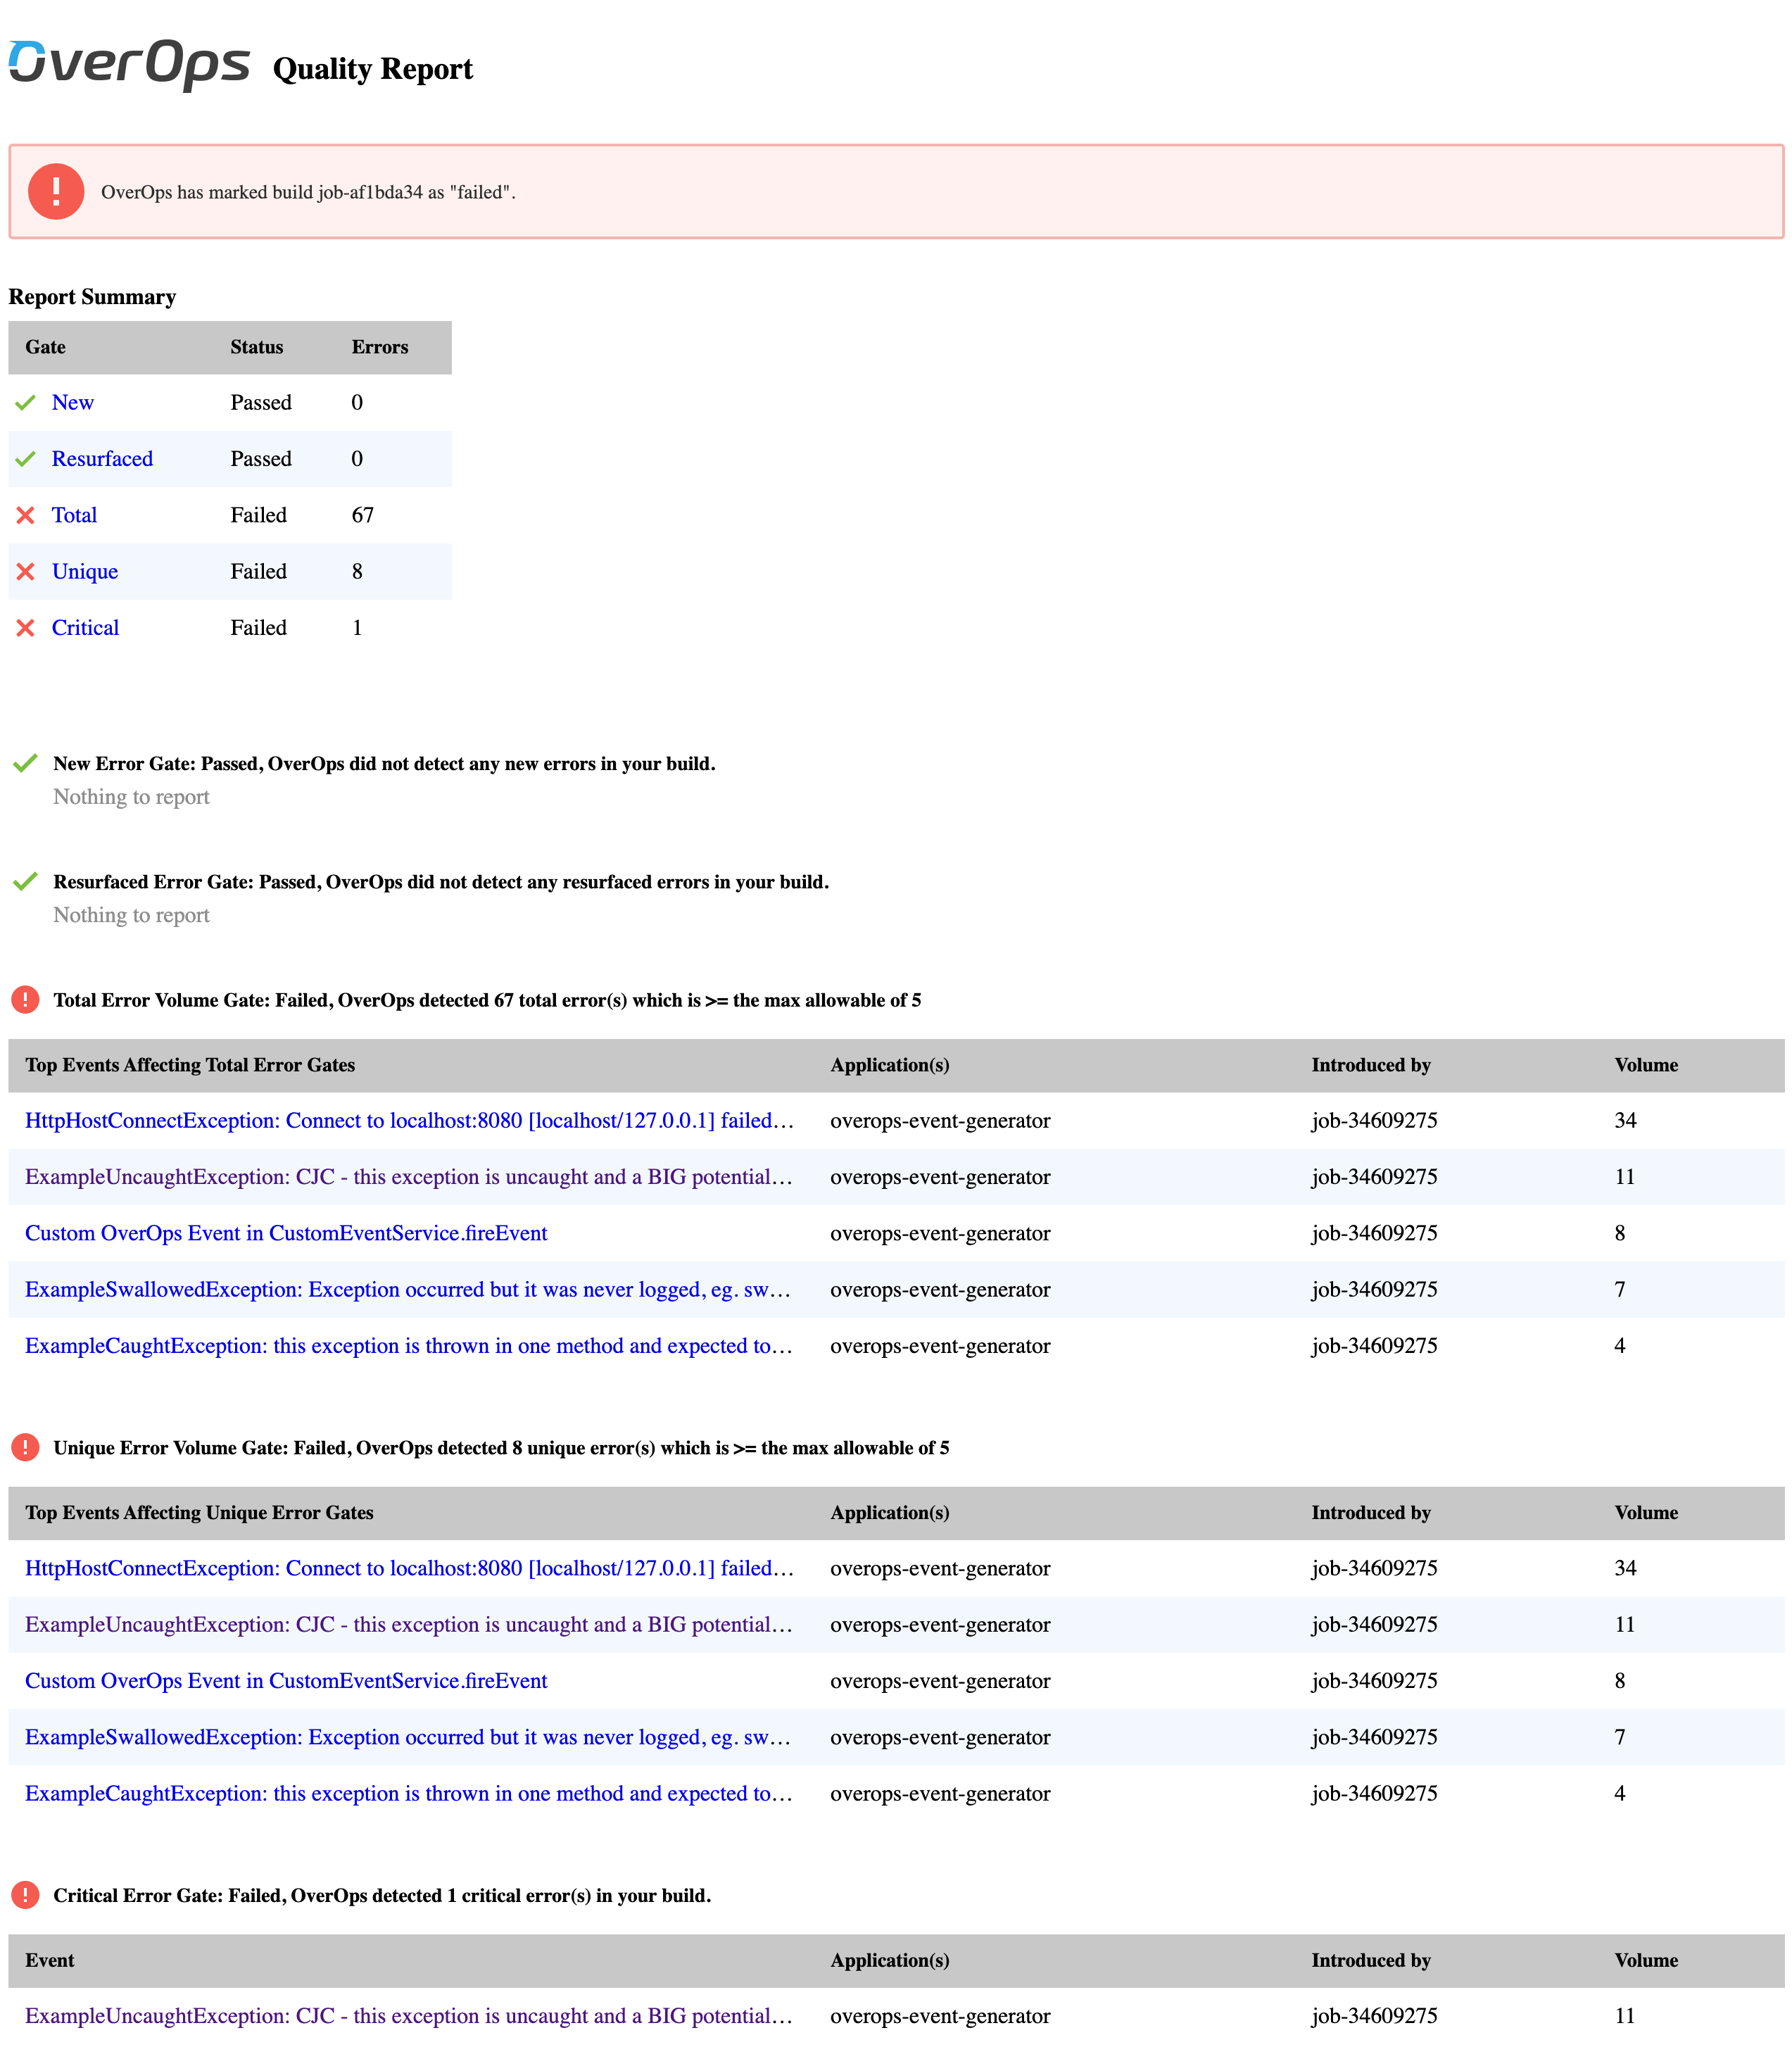
Quality Report Example
Updated 9 months ago
