Install a Collector in Kubernetes with Helm
Introduction
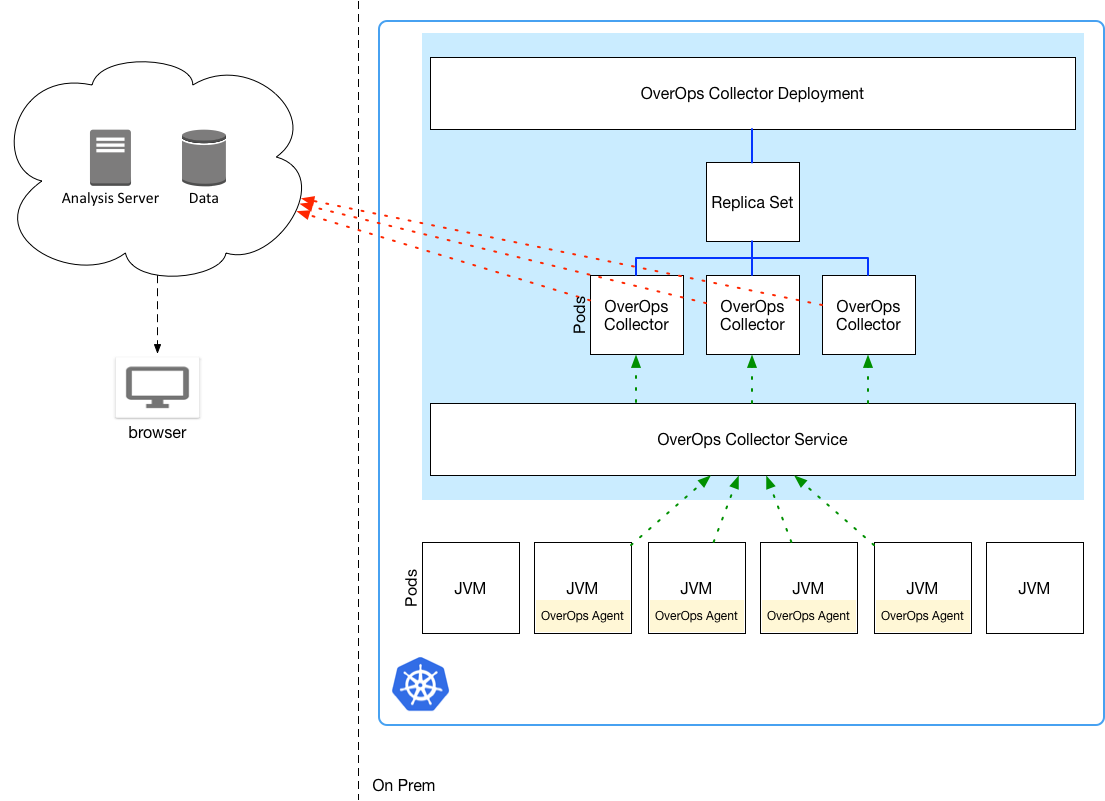
In this section, we will install the Collector using the OverOps Helm Chart which is preferred method of installing OverOps components on K8s.

Prerequisites
- This procedure assumes a K8s cluster is already available and you have kubectl and helm clients installed.
- The K8s cluster has access to the OverOps Docker hub repository.
- The K8s cluster has access to the OverOps website (SaaS) or an On-Premises OverOps Analysis Server.
- An Installation key provided for your OverOps environment.
- You can also get this key by going to the Settings page, clicking Manage Environments in the top right corner, and copying the installation key of the environment that you're installing.
Add the OverOps Helm Repository
The first step is to add and update the overops helm repository to ensure you have the latest helm charts.
helm repo add overops https://overops.github.io/helm-charts
helm repo update
Install the Collector with the Helm Chart
Now with the helm repo add you are now ready to install the collector, remember to use your installation/service key!
# Deploy the Collector connecting to OverOps SaaS (Default)
helm install -n=overops --set overops.serviceKey=<Installation Key> collector overops/overops-collector

# The following command deploys the collector into the overops namesapce using a dummy
# installation key and points to a local Analysis server.
helm install -n overops --set overops.serviceKey=<Installation Key> --set overops.backendURL=http://backend-overops-server:8080 --set overops.storageTestURL=http://backend-overops-server:8080/service/png collector overops/overops-collector

# Tip! If you install the Analysis Server using Helm, you can use the Helm Release name
helm install -n overops --set overops.serviceKey=<Installation Key> --set overops.backendReleaseName=backend collector overops/overops-collector
TipKeep up to date on our OverOps Collector Helm Chart and OverOps Collector Docker.
Verify the Deployment
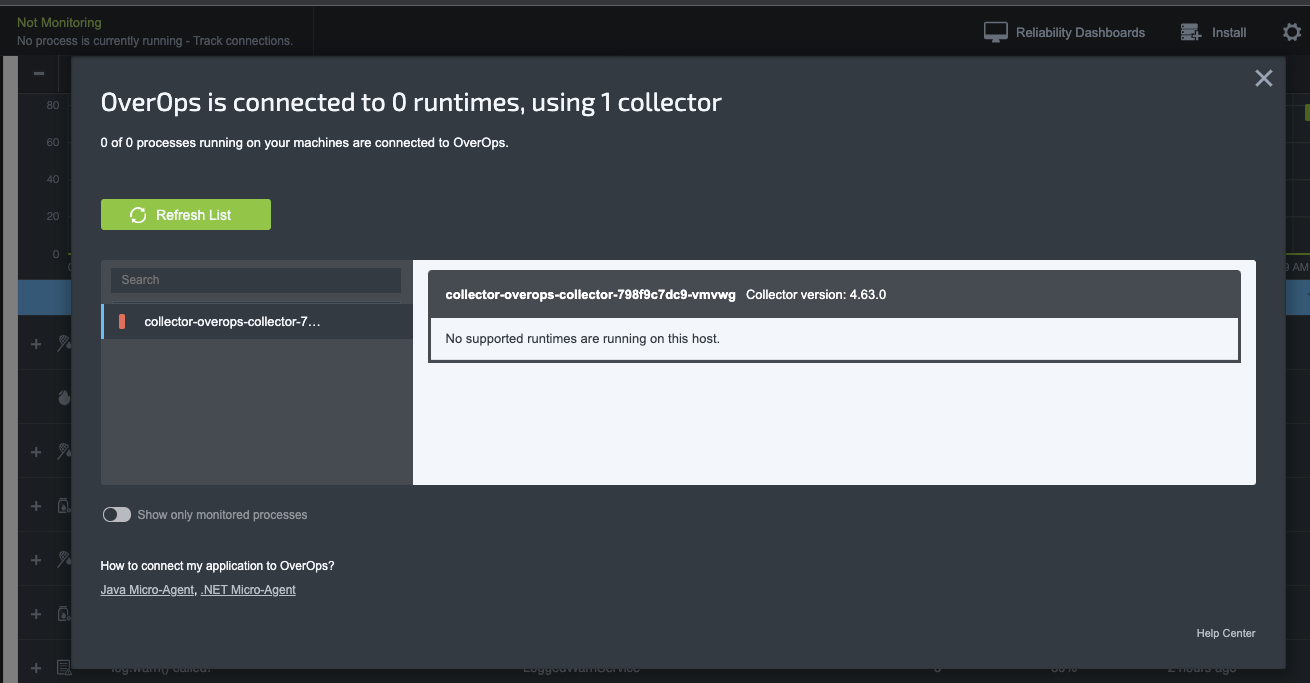
Once the collector pod is up and running, you should be able to verify that a collector is now connected to your environment using the OverOps website.

Expose the collector port
While there are many different ways to expose a service, in this example we can use port-forwarding to expose the collector service which allow connections to OverOps Agents.
export POD_NAME=$(kubectl get pods --namespace overops -l "app.kubernetes.io/name=overops-collector,app.kubernetes.io/instance=collector" -o jsonpath="{.items[0].metadata.name}")
export CONTAINER_PORT=$(kubectl get pod --namespace overops $POD_NAME -o jsonpath="{.spec.containers[0].ports[0].containerPort}")
echo "Agents can now access the collector at 127.0.0.1:6060"
kubectl --namespace overops port-forward $POD_NAME 6060:$CONTAINER_PORT
WarningExposing the collector using port-forwarding is for demonstration purpose, work with your cluster admin to determine the best solution for exposing a collector service.
Updated 9 months ago
