Jira Integration
Introduction
OverOps integrates with Atlassian's Jira tool to allow opening and managing issues directly from the OverOps web application, and enhancing efficiency by incorporating OverOps into existing ecosystems.
NoteYou may want to check out the Best Practice and an additional Tech Talk video about the Auto-creation of Jiras.
Integrating OverOps with Jira
To connect OverOps to your Jira account:
- In the top right-hand corner of the OverOp dashboard screen, click the account icon and choose Jira.
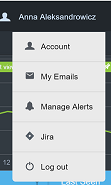
The Jira Settings dialog box opens.

- Use the slider to turn Jira on.
- Enter your credentials: Jira hostname, your username, and the API Token Key or Password - for Jira Cloud you'll need to enter the API Token and for Self-Hosted Jira use your password - and then click Save Changes.
OverOps saves these details.
Jira Credentials Important UpdateDue to an Atlassian Cloud recent product update (June 2019) Jira no longer supports basic authentication with a password.
See: Atlassian support: Deprecation of basic authentication with passwords for Jira and Confluence APIsIf you previously used your Jira user password on the Token/Password field, you will need to update your credentials to the Jira API Token.
See: Atlassian support: API tokensIf you are using a Self-Hosted Jira you should continue using a password (API Tokens are not supported for On Premises Jira).
See: Self-Hosted Jira authentication
NoteIf you're running Jira in an On-Premises deployment, verify that the Self-hosted JIRA flag is set.
Once you’ve set up the integration, Jira issues can be opened for specific, or a group of exceptions.
Opening Jira Issues Using OverOps
NoteWhen Jira issues are opened from OverOps, they include a link to the Automated Root Cause (ARC) screen in OverOps. This link includes the application name, deployment name, and server name or group, so it's critical that applications, servers, and deployments are properly named while monitoring with OverOps.
Refer to this Best Practice article and to this documentation article for more information.
To open Jira issues from OverOps:
- From the Dashboard, right-click the event and select Send to Jira:

-or-
- Hover over the event for the Event toolbar. From the Event toolbar, click
 for more options, and select Send to Jira:

-or-
- Click the event and in the ARC screen, click Send to Jira:

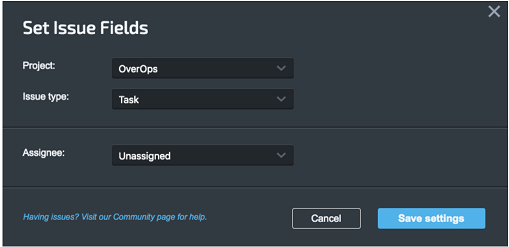
The event details window opens:

OverOps provides a default title and description of the event.
- Select the project to which to add the issue and set the issue type.
- Edit event summary and description if necessary.
- Fill in the Due Date and click Create Jira Issue.
A Jira issue is created and linked to the event in OverOps:

- Click the link to open the issue in Jira:

Once an Issue is opened in Jira, the event is tagged with a Label called Jira.

To view the Jira issue in OverOps:
- From the Event, click and select View Jira Issue:

The Jira Issue dialog box opens displaying the mandatory fields set for the Jira project:

Advanced Settings for Admin Users (Only)
Disabling Access to Jira Projects from OverOps
OverOps enables admin users to disable access to certain projects.
To disable access to Jira projects from OverOps:
- From the Dashboard, click Settings and from the list, select Jira.
The Jira Settings dialog box opens:

- From Available Projects, click Load Projects.
- From the drop-down list, un-check the Jira projects to which to disable access from OverOps and click Apply. By default, all projects are available to send issues to.
Component Mapping
Some users may want to automatically associate generated Jira tickets to a ‘Jira Component’ to better organize what events come from a given application or software component. To do this we have provided the ‘Component Mapping’ configuration field. The valid values are as follows:
-
None
OverOps will not associate a ticket with a Jira Component -
Application Name
When OverOps creates a Jira ticket for an event the Application Name is used as the Jira Component name. If for some reason a component does not exist with the matching Application Name a label is created with the same name. This allows tickets to still be created while allowing for Jira maintainers to query tickets.
Changing Jira Deployment from OverOps
By default, OverOps searches for the Jira host via the OverOps cloud but it can also be hosted locally. When hosted locally please set the Jira deployment to host Jira locally. OverOps will then connect through the collector to the locally hosted Jira.
To set Jira deployment to host Jira locally:
- In the Jira Settings dialog box, click View advanced settings:

- In the Deployment Settings field, select Self-hosted Jira.
Set Global Jira Settings
OverOps enables admin users to set global settings for all its members.
To set global Jira settings:
- From the Jira Settings dialog box, check the Use same Jira settings for all teammates checkbox.
To retrieve the global Jira settings from the properties file located on the Collector machine:
- Select the Read credentials from the collector's properties file check box.
- To connect via the Collector to the Jira On-Premises, in the Deployment Settings, select Self-hosted Jira.
- From the Collector, open the collector.properties file and edit according to the OS below (note that on older versions the collector.properties file was named takipi.properties):
/opt/takipi/collector.propertiesc:\takipi\collector.properties/Library/Takipi/collector.properties- Add the following parameters at the end of the file:
jiraHostname=<MY_COMPANY_JIRA_SERVER>
jiraUsername=<JIRA_USERNAME>
jiraPassword=<JIRA_PW>- In case you need to configure proxy for your jira integration, add the following parameters at the end of the file:
#Jira Proxy
jiraProxyHost=<PROXY_HOST_NAME>
jiraProxyPort=<PROXY_PORT> ( default is 80 )
jiraProxyUserName=<PROXY_USER_NAME> ( in case if authentication proxy )
jiraProxyPassword=<PROXY_PASSWORD> ( in case if authentication proxy )
Configuring Auto-Jira Rules
OverOps allows you to create Jira issues automatically using view-based rules (see Managing Alerts for details).
To create an Auto-Jira Alert rule:
- Open a view, select Add Alerts from the popup menu, select the Jira tab (see Adding Alerts through the Views Dashboard and enable Jira.

- Click Configure and set the Jira issue parameters:
- If you haven't already enabled your Jira account, you'll be prompted to enter your credentials: Jira hostname, your username, and the API Token Key/Password (for Jira Cloud you'll need to enter the API Token; for Self-Hosted Jira use your password).
- Click Save Changes.
- When finished, click Save Settings and then click Save & Finish.
Events are now sent to Jira for the configured views automatically.
Updated about 1 year ago