Eclipse
Attaching the OverOps Agent to a JVM Running Java 10 or 11When attaching an OverOps Agent to a JVM that is running Java 10 or 11 or any IBM java versions, follow these guidelines:
Turn off Class Sharing: This can be done using the following flags:
for IBM Java
‑Xshareclasses:none
for HotSpot
-Xshare:off-XX:-UseTypeSpeculationIncrease ReservedCodeCache to at least 512mb by adding the following flag
-XX:ReservedCodeCacheSize=512mThe Agent should appear last in the VM arguments list before specifying the main class or jar.
When adding/removing 3rd party packages, the Agent should be restarted.
Additionally, if you wish to upgrade your own compiler to target Java 10/11, then you'll have to upgrade your Collector (SaaS) or Collector + backend (On-Premises) to support it.
Rootless Agent Installation Method (Linux only)When Using the Rootless Agent Installation Method replace the
-agentlib:TakipiAgentJVM startup Argument
with
-agentpath:<TAKIPI_HOME>/lib/libTakipiAgent.soJVM startup Argument
The OverOps Agent runs on the JVM. You can launch the JVM with OverOps, using various launchers. When launching the JVM with Eclipse, follow the instructions of the relevant debug configuration:
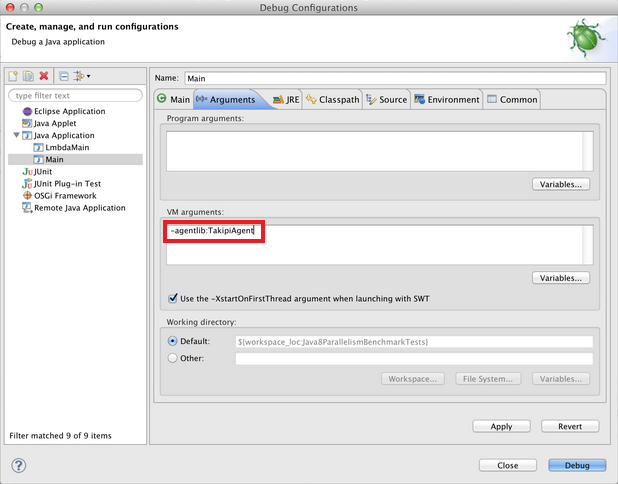
Java/Scala Application
To launch the JVM using Java Application:
- From Eclipse, open Debug Configuration.
- From the Arguments tab, in the VM arguments box, add
-agentlib:TakipiAgentor respectively-agentpath:<TAKIPI_HOME>/lib/libTakipiAgent.so

- Click Apply.
- Start the application you want OverOps to monitor.
- Test your Installation
Tomcat-Eclipse Plugin
Glassfish-Eclipse Plugin
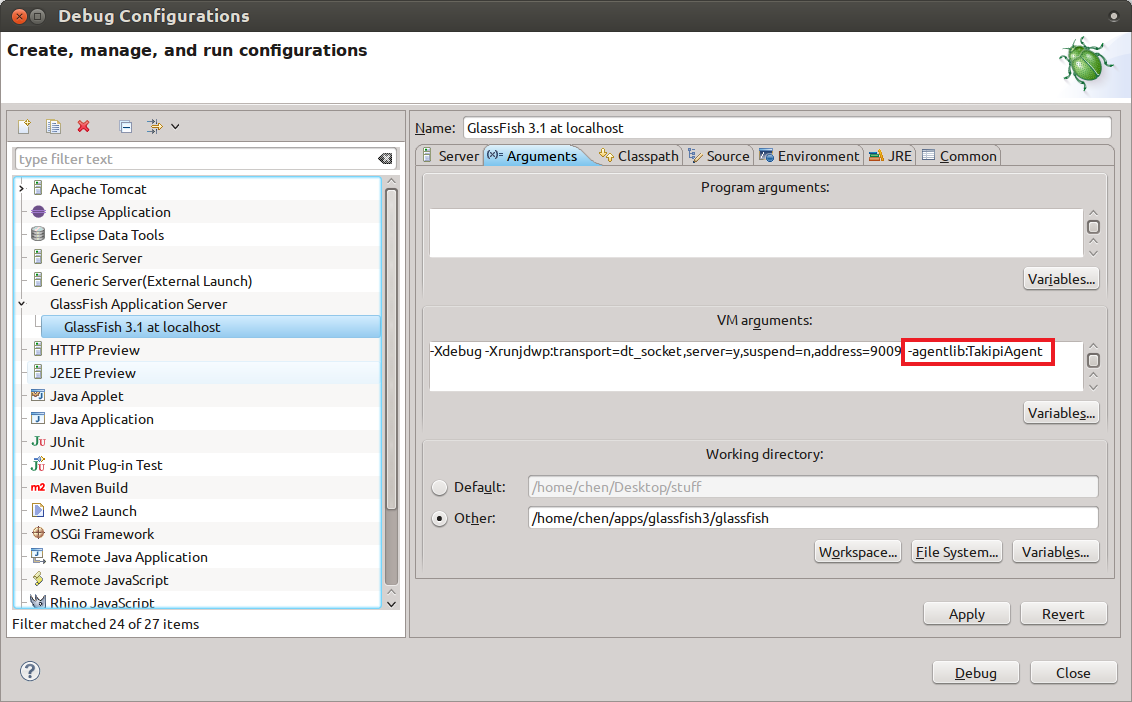
To launch the JVM using Glassfish:
- From Eclipse, open Debug Configurations.
- Select Glassfish Application Server --> <Your Glassfish configuration>.
- From the Arguments tab, in the VM arguments box, add
-agentlib:TakipiAgentor respectively-agentpath:<TAKIPI_HOME>/lib/libTakipiAgent.so

- Click Apply.
- Restart Glassfish.
- Test your Installation
JBoss-Eclipse Plugin
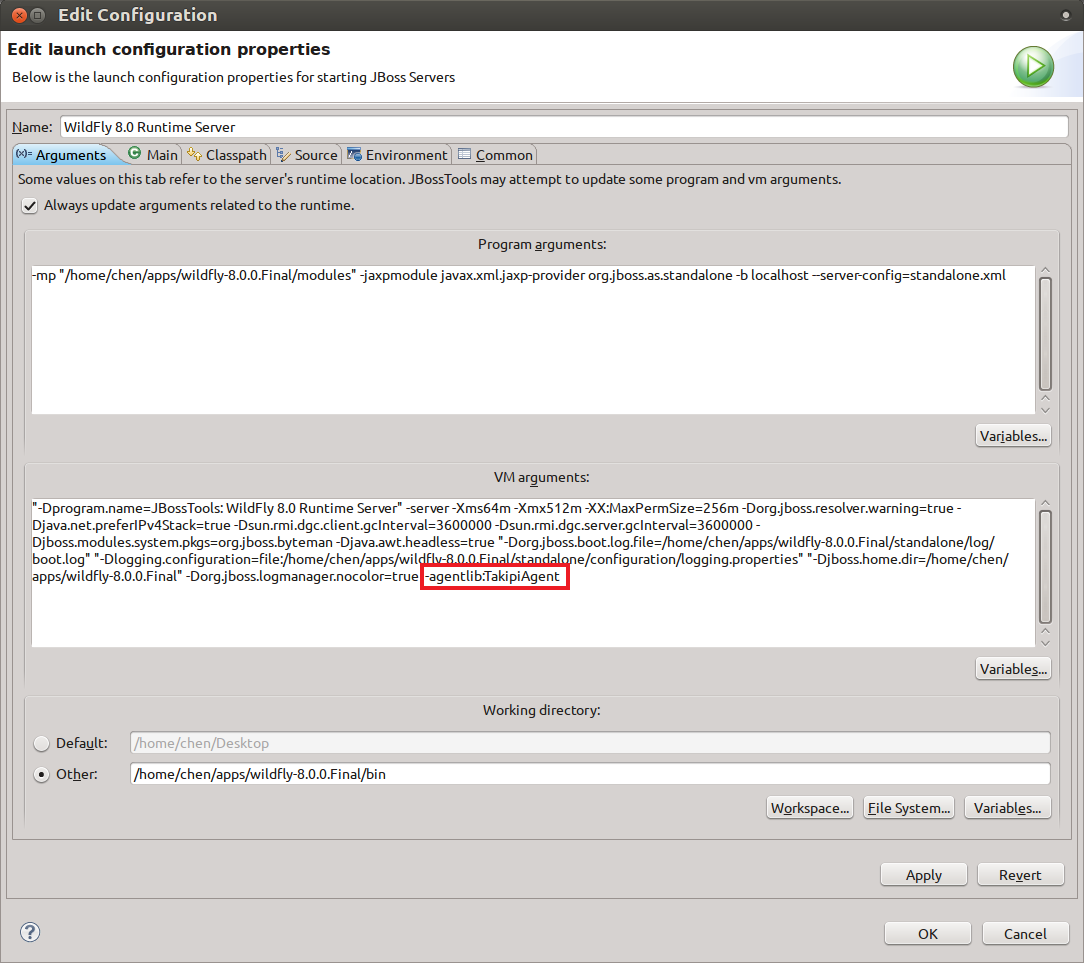
To launch the JVM using JBoss:
- From Eclipse, open the Servers window.
- Double-click the Wildfly (JBoss) server and then click Open launch configuration.

- From the Arguments tab, in the VM arguments box, add
-agentlib:TakipiAgentor respectively-agentpath:<TAKIPI_HOME>/lib/libTakipiAgent.so

- Click OK.
- Restart JBoss.
- Test your Installation
Updated 9 months ago
